This Saturday we will be meeting my new niece, Charlotte Mai, born in January. When her older brother Alfie was born I made him a giraffe quilt...
but for Lottie I've decided on bunting. I made some for the 10yr old when she was 4 or 5, as decoration for a birthday party and it's been used and enjoyed ever since. Hung inside or out, I love bunting and I'm hoping that Lottie, and her parents!, will too. I found a 'fat quarters' bundle of polka dot fabrics which set the tone for the rest of the project. I am not a huge fan of pastels, so I pulled in a couple of darker colours including my favourite apple green thread and a beautiful teal satin bias binding.
I drew out her name in a soft, curvy font. Gentle and not too fussy. I like to play with drawing out my own fonts, but you can print pretty much any font in a large enough size to use as a template. I then cut the letters out to use as templates.
I ironed bondaweb onto the four felt fabrics that I had chosen and traced the letters. They must be placed on the bondaweb in reverse; otherwise they will be back to front when you turn them over - far too often I've made this mistake!
I then cut out a triangle template, which I laid onto my various cottons and used to cut out my bunting. I used pinking sheers to give them that distinctive bunting edge. Once I had enough triangles I mixed and matched them and the lettering until I was happy.
On a spare triangle I added a little owl, which is based on a couple of designs that I found online.
To attach the triangles to the bias binding, I laid the binding face down. The fold of the bias binding that faced me would be the top of the bunting once finished. I laid the triangles out, right side down and with their points facing away from me and then slipped each triangle under the fold of the binding which was closet to me. I pinned them in place.
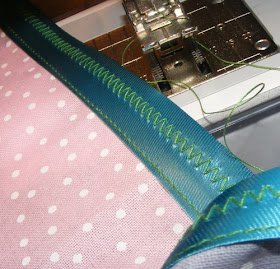
I then sewed a zigzag stitch down the pinnings, turned the bunting over and, to secure the bottom fold, sewed a straight line underneath the zigzag.
The basics finished, it was time to add some decoration. I raided the button box, draped the bunting across the dining room and started to pin the decorative pieces in place.
Tonight I'll sew them all in place and may also add some embroidery.
What I used: fat quarters of cotton fabric; felt for the lettering; bias binding; bondaweb; assorted buttons and beads.


No comments:
Post a Comment