Friday, 31 August 2012

Dahab back...

I had planned a little "Dahab bound" post before we left, a little wishlist of sorts for the holiday to come.  As it was, in all the busy hustling before we left, it never got off the ground; and now we're back, our seven days of sundrenched peace quickly becoming the stuff of holiday snaps and fond memories.

It was a lovely holiday though.  People seem a little confused (some, I'd go so far as to say offended) by my lack of things to say about it, but we really didn't do anything much at all.  No one, however interested, wants to hear about my umpteenth fruit cocktail or how the Mocha Milkshake that we had on the last day was just "ahmazin!", or that the sunbeds nearest to our room where lovely, but possibly not as practical (unless you don't mind moving with the sun) as the more exposed ones by the road - not that you really noticed the road at all.  I read eight books and started another (kindle here we come) and the lovely boyf and I got ourselves a rep, being the only couple who were not family, Aussie backpackers, or doing our PADI Open Water course (a very popular past time at the Dahab Paradise), as the dedicated nose-in-book sunbathers.  We were surrounded by genuinely lovely, friendly people; wonderful, wonderful hotel staff; wildlife and stunning scenery.  It was a place that you could sit and look at day after day and still find something new to see; a place where the pace of life slowly winds you in and you learn to just sit back and enjoy; a place where you just let things happen as they do.  No doubt we could have done more, when we go back we may be persuaded to stretch our legs a little more, but for that week we did exactly what we should have done; sat back and let the warmth relax us.

Back home, it's all back to busy.  We have only a couple of days now until the 11yr old officially starts secondary school and all the last minute panic that comes with it.  Not that I am worried about her going to school (ok, I tell a small lie, the small mix up with the school bus application and the prospect of her having to travel alone on public buses for a couple of weeks has me nervous), on the contrary I am more than ready for her to enjoy the structure and responsibility that the change brings!  She seems to be ready for it too, I wouldn't have said as much at the start of the summer, but in the last six weeks she has grown into her new "grownupness", not entirely, but enough.  She's ready, I'm ready; now all I need to do is get to the end of the seemingly endless shopping and to do lists...

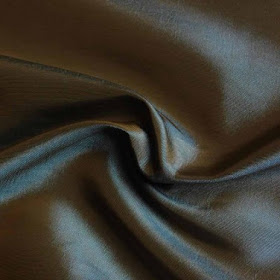
And on a final note, the samples were disappointing.  So disappointing!  The grey wool had a herringbone pattern in it that wasn't mentioned in the description and I would never have ordered if it had been.  The grey taffeta was a completely different shade to its photo on the website (a good reason for always ordering a sample).  The "sage" taffeta was also not what I expected; gone where the dark olive tones of the picture, instead it was an insipid mix of washed out lime and a watery blue (again, had I known, I would never have ordered a two-tone fabric).  The black taffeta was the only option, but "light" enough to be see-through if held up to the light.  I have sourced a medium weight alternative but am going to take a trip to the local fabric store first.  They only really stock upholstery fabrics, but I might get lucky; I really would like to find a dark grey...

Oh, final, final note.... the Halloween invitations have (finally!) been started... I am so behind schedule this year it's almost scary; I am even secretly pleased that the 11yr old wants to go shop bought as opposed to home made, as I have a feeling I'll have enough to do to get myself sorted out in time.  The big question though (hopefully, not giving too much away) is by what method (one that keeps a years worth of sewing intact!) will I fake my demise?  All suggestions welcome :o)

Wednesday, 22 August 2012

Sleeping Goldie, Wordless Wednesday 22nd August 2012


Yes, a small cheat, but I don't know why this didn't upload as I hoped it would during my sundrenched absence, and I don't like gaps...


Samples, samples, samples

My local fabric shops are not great on dressmaking fabrics and whilst I know that I could use an upholstery weight fabric for the main gown of this project, I don't want to be a sweaty lump!  I would rather a lighter fabric and line with drill or add another petticoat to the skirt, depending on where I need the extra weight.  So, last to-do on my costume, before our holiday on on Friday, was to order some sample fabrics.  I've chosen a dark grey wool suiting and three taffetas; a plain grey, a silk black and, I'm not entirely sure why, but am going with my gut here, a plain "sage". 

Charcoal Grey Suiting
Plain Grey Taffeta
Black Silk Taffeta
Plain Sage Taffeta
They should be waiting for me when we get back...


Monday, 13 August 2012

The Elizabethan Over -sorry, fore- sleeves

After a day of hard graft, I had the house to myself on Saturday evening and decided to make the Foresleeves (my first lesson of the evening, they're not Oversleeves at all!) for my Tudor costume.  My second lesson was to pay attention to the naggy little voice at the back of my head.  I knew the sleeve that I was tracing and cutting out was too small.  I checked back on my notes and it wasn't Sleeve 3A (the one I did want to be cutting out) but 3C.  I don't know why I got as far as cutting it out of my fabric before I sorted myself out, but I was convinced that I was making Gown C and therefore had to be wrong.  Well, I was wrong, just the wrong wrong.  The pattern pieces that I cut out are safely tucked away should I ever decide that I need a second burnt orange Tudor costume and I started again... 

As ever, Ms Anderson was not much help.  If I was slashing my sleeve and adding false puffs, there were a wealth of instructions.  To make a simple sleeve, the instructions were wonderful in their brevity: "flat line the pieces" (there or there abouts).  I knew what I was aiming for and went my own way.

I cut two pieces out of the top damask fabric and two out of the black cotton drill.

This is the wrong sleeve, but you get the gist :o)

Pinned them together, right side to right side, and stitched from one end of the narrow closure at the bottom to the other end.


The sleeves were turned inside out and pressed.  When pressing them, to ensure that the seam is pushed out fully, I like to run a ruler around the inside of the garment, against the seam, and follow it with the iron.  I gives a lovely sharp finish to the edge.


The bottom hem was turned in, pressed and slipstitched closed.  It is the wrist of the sleeve.


Working from the wrist to the elbow end of the sleeve I marked four points; one at either end and two equidistant in the middle.  At the elbow and on the two middle joins, I slipstitched both sides together, through all four layers of fabric, for approx 12mm to give a nice secure closure.  The cuff I will come back to.

The Beaded Detail: with the sleeves done Saturday night, I was awake about 6am Sunday and decided to have a play with some ideas for the beading on the sleeve.  I love a quiet dawn and a good cup of green tea at times like this.  In my research I have seen many jewel finishings for these sleeves that look like six-petalled flowers, usually in gold with a gem in the centre.  I wanted to replicate this, but using the same beads as elsewhere on the outfit.  In stitching the damask layers together, I deliberately left the stitches visible, as a little guide to myself for the beading.  The beads that I use have flat edges around the centre hole and I wanted them to be hidden.  If you stitch a bead on with one stitch, it will invariably sit upright (as shown below), exposing the edge that I wanted hidden. 


A second stitch will pull the bead down onto it's side (see below).  To create my flower I sewed a centre row of black, amber, black...


and then two black beads top and bottom, off centre to the middle row. 


One bead flower. 

At the wrists I decided to put a hook and eye in.  Once again I'd gone a size up and the fit had ended up being tight.  I'm no longer sure if it's me, the pattern, or just as its supposed to be and simply feels odd a few hundred years later!  In my googling I'd read a few mentions of hook and eye closures at the wrists, it seems a great deal easier than trying to ease a tight fit over the ruff and cuff.  My beaded flower on this join was split in to, the middle and one row of two on one side, the second row of two on the other.


I also added a ribbon tie, in keeping with my Holbein lady.  Ties all the way up felt a little fussy, but I like the one at the cuff.


A pair of finished foresleeves.


I decided to stitch the cuff to the ruff and finish it with the black ribbon tie as planned.  I lined up the bottom of the cuff with the bottom of the bias binding on the ruff and stitched the ribbon tie on, being careful not to go through the cuff lining for a nice, clean finish.


And then it was time to try it all on.  If I made this again I'd make the smock sleeve possibly as much as half as deep again, the puffs are neat, I would like a little more umpf!  I need to put eyelets in the top of the foresleeves and the kirtle sleeve and then thread them together, that might give me a little more to play with on the smock sleeve, once I can relax and not expect the foresleeve to slide off.  But, overall, I'm delighted.  The bead detailing is the first real bit of glam I've got attached to this outfit and I love the way that the lining has turned to create a black border on the openings.  All in all, a good evenings/mornings work.

Sunday, 12 August 2012

Tinkering...

It's been a great weekend of sewing (more tomorrow), building a new coop for the bantie chooks (more another day) and tinkering on the laptop (see right).  I found out this week how to image map pictures, which allows you to embed more than one hyperlink in an image.  I was thinking primarily of ways to use it on the intranet at work, but couldn't resist a small play here so clicking on "hello", "about me", "elizabeth" or "victoria" on the image on the right should link you directly through to the page of your choice.  It's a quick first stab at the technique but I do love it; I think I'll be playing with it quite a bit more!

Wednesday, 8 August 2012

A chicken in the doghouse!

Shakira is proving feisty.  So feisty in fact that I quickly got tired on Sunday of calling "Shakira!" across the garden.  Thanks to my lovely sister-out-law, L, and as a nod to the gold-winning Jessica, she is now Ennis.  Etta and Ennis, it has a nice ring.

Tiny (a Wheaten Old Game Hen, I finally found out) lays tiny white eggs and is happier to pose!
Not that it's changed her temperament.  Etta is a benevolent (and slightly lazy) top chook, you'll get a peck but she can't be bothered with much more than that or any sort of chasing about.  Ennis, on the other hand, is a bit of a bully and she really goes for sustained attacks on the little two, particularly little Tiny.  Etta doesn't get involved in restoring the peace (I miss Red, she'd have had none of this nonsense) and by last night I decided it was time that the little ones had a break; Ennis was sent to the doghouse!  Hopefully, by separating her out, the banties will get used to Etta and her odd peck, stop hiding in the coop for the majority of the day and then spend the short time they're out tearing up and down the run to get out of the way, jumping at the sight of a bigger chook (they completely panic) and trying to escape behind the hanging feeders (they're going to get hurt).  Etta is not happy, she and Ennis have bonded nicely, but she'll manage for a day or two and tomorrow the lovely Mr S is coming over to start the new run, one with plenty of nice high spots for the banties and maybe a hiding place or two.

Megs saying hello with her best low head like me approach.
No doubt they'll eventually sort themselves out, if not, Ennis is going to be replaced... or I could turn the dog run into a second coop and have more chooks!  I'd better make myself scarce when the boyf reads this; love you honey!  In the meantime I think I need to make my current  more bantie-friendly first, give them a chance to use their brains over the brawn of the larger two!

The Elizabethan Smock, finished...

ok, ok technically I need to sew on a couple of ties but the big stuff... all done!  Little dance around the room.

I had time for one photo, one photo only, this morning and apologies for the odd Venus de Milo pose and grumpy face (it's too early in the morning) but, despite the appropriate underwear, it's such fine cotton that I wasn't entirely sure that I wouldn't end up embarrassed.  Though I realise, in retrospect, that I wouldn't have covered anything anyway!

The hem was hand sewn last night, I will put the ties on the cuffs (and ruffs if needs be) once I've decided on whether the ruffs will be tacked onto the cuffs (cuffs, ruffs, cuffs, ruffs.... I feel like I'm in a Dr. Seuss book!) or the inside of the oversleeve.  I am quite liking the idea of tacking the ruffs to the cuffs and then finishing the ruffs ("Green eggs and ham? I do not like them Sam-I-am") with some 3mm black ribbon and using that as the ties.  I thought it would be a lovely detail if it ran all the way round the join between the ruff and the bias binding and then extended into ties.

I can't believe that it's finally done (or that I've been rattling on about it since 17th May!) but it's done, done, done and in celebration, I'm starting on those oversleeves asap... it'll be lovely to have some colour back in my sewing, bring on the orange damask!

Tuesday, 7 August 2012

Cuff and Ruff, part 2


Sewing the bias binding onto the ruff was surprisingly fiddly, thanks to the variation in density between the cotton bias and the cotton lawn.  Even with an embroidery sharp, it took time and concentration.  I pressed the bias in half lengthwise and slipstitched it to each side individually.  The ruff is only 1/4" bigger than the cuff (oops!) and not as gathered as I had thought it would be. 


As I was finishing the ruffs, I was contemplating the use of hook and eyes and did a little googling.  In particular at photographs of the ladies' smock in the V&A collection, which clearly shows a thread tie looped through two eyelets.  I don't know if I'm brave enough to risk a handsewn eyelet yet, but I will forgo the hook & eye finish for a thread one.  Oh so slowly getting there.

Monday, 6 August 2012

Ruffs, then cuffs and back to ruffs!

Once again, and I am getting a little bored of this observation, I found myself flummoxed by Margo's instructions, this time to make the cuffs for the smock.  This was a good three weeks ago and it really left me in a huff!  The whole smock has felt like a battle, which is a shame as it is an integral part of the outfit and will be lovely when it's done.  Not having made cuffs before, I did some research on methods, none of which seemed to resemble the instructions that I had in front of me, and in the end decided to go it alone.  It's not that difficult after all, certainly a lot less fussy than what was being asked of me - and I just can't figure out why the extra fuss was called for.

In the interim I started on the ruffs, two long rectangles of cotton, joined with an inch long placket at the top, hemmed and gathered round the top.  The hems were two 3mm turns, far too delicate for machine sewing, so I hand stitched the lot.


Once the cuffs are complete I can bias bind the top edge (they have to be a 1/2" bigger than the cuff), add a hook and eye closure and they will be ready to tacked onto the cuff or the inside of the oversleeve, as and when I get that far!

So, onto the cuffs themselves.  I made a sandwich of a layer of interlining with two layers of cotton underneath, and stitched a 1/8" seam from the bottom of one short side, down the length of a long side (now the "top" of my cuff) and down the second short side.


The seams were trimmed to 3-4mm and the corners clipped across the diagonal. 


The cuff was then turned inside out, so that the interfacing was encased in between the two layers of cotton.  As the cotton is so fine, the layer that lay directly next to the interfacing was my "good", outer surface and the layer which had been turned over, my inside surface, as the trimmed edge is ever so slightly visible.  It is a snug fit, obviously I get a little give with the hook and eye, bit it looked rather like a bandage or a sweat band!


Moving onto the smock, I long stitched a double row of straight stitch around the bottom of the sleeve and gathered them to fit the cuff.


The bottom of the sleeve also had a placket (2" long) and the cuff was matched to it (right side to right side) and pinned in place.  Again it would have been a fiddly sew on the machine so I hand stitched the right side and interlining of the cuff to the sleeve a 1/4" from the outer edge.  Once done, I turned the cuff right side round and slip-stitched the inner layer of cotton in place.


One finished cuff... note the one!  I have more sewing to do tonight.  I'm pleased though, the gather is tight and very full, the depth of the cuff is nice too (deeper, I think, than the instructions would have but it feels good and sturdy!) and it looks the part. 


I hope, tonight, to get the other cuff and both ruffs finished off with a couple of pictures to update this tomorrow.  Then I just need to hem the smock and finally, finally!, it's done.

Saturday, 4 August 2012

Chookadelightful!

I lay in bed yesterday morning at 5am (the dog-alarm was a little early!) planning what I'd need to do if I wanted to get some new chooks... by 5.15 I was in the garden dismantling the coop ready for some repairs and repainting.  The coop itself got a good clean, the roof panels came off to be repainted and the hinges replaced.  

Roof off...
Amazing the difference a new coat of paint makes!
The "temporary" run got a good clean too; the lovely Mr S is threatening to replace it with a "proper" one this summer ;o)  and this afternoon the boyf and I built a new corridor as the old one was creating a muddy mess.  I say "we", I mean "he" as I was an utter DIY disaster-area today.  I've super-sized my thumb, getting it caught in the tin snips; embellished my foreman with a rather fetching collection of cuts and scratches; impaled my heel on some steel wire and, to top it all off, seemed to attract every mosquito in a 4 mile radius.... it's not a pretty picture!  Etta looked on from the dog run, perching on the side of the old Victorian tub, and, as the afternoon was punctuated with cries of "gloves!", "mind that!", "watch out!" and "oh darling, what have you done now?" as the boyf increasingly despaired, I think she was secretly laughing at me!

The lovely Mrs B joined us for a trip up the local hatchery.  It's an odd place, eccentrically disorganised, and not all that keen to sell you a chicken if they don't think you're up to the task!  We almost gave up until we got caught up in an impromptu introduction to quail keeping (hmm, quails...), were given a couple of dozen eggs to try and finally found ourselves picking three new chooks.  I deliberately picked them from three separate flocks so that they all felt new, with no pre-existing alliances, and we came home with a Columbian Blacktail called Shakira (she's Columbian after all), a Gold-laced Wyandotte bantam called Goldie (not particularly inspired but there's a theme here) and an Old English Game bantam called Tiny (Tempah) after the hissy fit she threw when we finally got hold of her; the irony being that we chose her because she looked to calm!  The Rock (or is that Rap) Chicks are in town  :o) and Etta (now Etsy Betsy according to the 11yr old, I think not!) wasted no time in telling them who was boss, though in overall I think they're settling quite nicely.  The only one I need to keep an eye on is Goldie, she's being told off by everyone and is far too nice to fight back.

Shakira Shakira (are you humming the song now?)
Goldie (Lookin Hen) though when I think Goldie, I'm a little more old skool!
Tiny Tempah... not yet happy to pose for photos, at least here she's not a blur.
It is lovely to see the run alive and bustling again, even if it's in the midst of the huffing and puffing that comes with sorting out the rankings.  Having such different temperaments is going to be fun too; the bantams are much happier perching that the larger girls, Shakira will be an escape artist and Tiny is a bulldog in a very small body!  I caught her jumping almost half her height to tell Etta off for have a peck at her.


Now, about those quails... just look at those amazing eggs and the birds are so small, I'm sure there would be room for a couple in the run!

Thursday, 2 August 2012

RIP Blue, a good chook!

It was slightly prophetic maybe to have chosen that picture of Blue yesterday; she died with less than a day to go till we could get her to the vet.  It was especially sad and frustrating as she was up and about that day and I thought we were winning the battle.  As late as an hour before she went she was pottering about and looking so much better that I didn't say my proper hellos when I came home, choosing to walk the dogs first instead and planning to spoil her a little afterwards.  I know she's only a chook, but I care deeply for my animals and I was enjoying the bond that was forming; who knew that she'd love to have her feathers blow dried or that she was a fan of tuna. 

Now, I have one last chook, Etta, and some decisions to make.  Ets can't stay on her own, she stood watch over Blue till I'd buried her and is chasing round the run in a panic today.  I don't know if I want more chooks though, I get far too attached to them.  The decision has to be what would be easier on her, joining an established flock or, hopefully, becoming a elder "aunt" to a couple of newbies... I guess I've just answered my own question!  First job though is to rehome Ets temporarily in the dog run and give everything a good clean, just to be on the safe side, before making any final decisions.

A weekend in Wales

The weekend just gone, it was time once again for the annual trek to Wales with the boyfs' company to "indulge" in a little eating, drinking scrambling up mountains and, this year, whitewater rafting!  On Saturday we walked, scrambled, climbed up Glyder Fawr, Snowdonia's 5th highest peak at just over 3200ft, in sun, rain and fog - sadly as we neared the top, no photos to be had - and down the path by the Devil's Kitchen.  It was, as all Welsh climbs are, an experience and a half and utterly worth every minute... we are also now going to have to go back and tackle the Kitchen properly, it looked well worth the effort :o)

The boyf and the 11yr old relaxing on the way down, Glyder Fawr in the background.
Walking down to the lake, Llyn Idwal.
On Sunday we were whitewater rafting in Llangollen.  Dodgy wetsuits aside, who looks good in a wetsuit?!? it was really good fun, though my frozen features in every photo might suggest otherwise!  Instead of going downstream and then being driven back, we stayed on a small section of the river and, thanks to the skill of our raft captains, were sent back time and time again into the "white stuff" to experience just a little bit more of the pounding cold!  Never having been in a raft before, the 11yr old took to it with abandon and loved every single second, I was proud of her!


And as we all enjoyed getting battered and bruised, the dogs enjoyed a weekend with the pack at E's.  This time it consisted of the dobe, a Rottie, Euraser and three Goldies... the little man did us all proud and proved that it's not the size of the dog that makes the dog! 

They seemed to have had a great time but came back as tired as us.  The boyf and I have overslept every morning since and the dogs have taken full advantage; it has been such a lovely way to spend the mornings, waking up under a pile of dogs... hmm, "pile" suggests, and there looks to be room for, at least one more! ;o)