Monday, 30 September 2013

Reshaping (Blocking) Needlepoint Canvases

My first great crafting love was, and probably still is needlepoint; though we parted company for a good few years and it's taken the introduction of it to the 12yo to remind me.  I learnt as a very young child and, having taught the 12yo am truly impressed with the patience on my Mother and Grandmother! When caught up in a project, I find it utterly addictive, soothing and satisfying, and especially good (and more sociable than sewing) when curled up on the sofa in the evenings.  With all the big sewing projects the last couple of years, I have not had the time to risk being diverted, but as this year's big sewing project is continuing to prove problematic, a diversion was exactly what I needed.  I have on the long-term "to do" list an idea that one day I will have sofas full of mis-matched, handmade and much loved cushions.  This is the first of the handmades, care of the extremely clever Emily Peacock and Kirsty Allsop's Craft: a tin of Sardines!  Having not had access to the wools recommended, I took liberties both with the colours (Anchor substitutions done by sight) and, as I found out right at the end of the project, the pattern as my printer rendered a third of the sardine's spots invisible!

Back in Hong Kong, where I learnt to love needlepoint, Mum and Nan made cushion tops all the time and off they went to the cushion making man and came back beautifully stretched and sewn into cushions.  A quick Google and I rapidly decided that, as a) I can make cushions and b) stretching a canvas couldn't be that difficult, £52+ was a ridiculous amount of money to spend on a similar service.  One quick read of a couple of Needlepoint Blocking 101 pages later, a scrubble round the draw for some tacks and a beg of the boyf to find me a piece of wood and I took my first stab at stretching a canvas.  It really is very easy to do and a good thing too as my second project is, literally, in hand!

I soaked the canvas lightly (it should be wet through but not utterly drenched) in warm water and rolled it immediately, and quite tightly, in a towel, to draw out the water: being careful not to rub or disturb the wool.  I then left it to rest for 5-10 minutes while I prepared the board.


You can, or course, buy boards but I wasn't going to spend the money on what might be my first and only attempt at this.  I also read suggestions that the board should be covered with fabric but this one was entirely smooth and I could not see the benefit in doing that.  I decided to keep is simple.  On my board I marked out a grid in pencil.  No great thought was put into it, the squares were the width of the ruler, they were simply there as a guide when eyeing everything up.


And then, with the help of the lovely boyf, we pinned.  As all the guides recommend, it is not so much about stretching the canvas to suit a shape, but working it; allowing some areas to ease as others are gently stretched.  It took a couple of goes, the canvas was quite twisted, but I am very pleased with the results.  Now we just have to be patient and wait for it to dry, 3-5 days is recommended.


If the canvas needs further stretching, and it is recommended in severe cases to repeat the process rather than try to force it the first time, then it can be redipped and stretched once completely dry.  I think I will be happy with mine as it is.  Now I just need to brush up on my cushion making techniques as this will be a curved corner, box pillow construction ideally with a zip and I hate zips!  Though the idea of the cushion being steely, sardine tine coloured, grey and a bright red or blue zip for detail does immediately make me smile.  In fact, I think I have just had a good idea... a zip sewn on externally, rather than hidden, with a ribbon detail at either end for neatness.... hmmmm.

Wednesday, 25 September 2013

Tofu Bechamel Sauce and Chilli Lasagne

Yes, Chilli Lasagne and why, I ask myself, had I not thought of it before?  Moreover, having performed a very thorough taste test last night, it is really, really good... possibly even better than Lasagne Lasagne!


The Chilli itself, which started out as just plain Chilli, before morphing into Chilli Nachos and finally Chilli Lasagne, is based on this recipe here (which I've mentioned before and will no doubt mention again), veganised with "faux" mince and vegan Worchester sauce.  The Bechamel Sauce, part of my series of "what can I do now with tofu" recipes is based on Bryanna Clark Grogan's recipe with a couple of changes made for taste and ease.

Ingredients:

1 box Mori silken tofu, with liquid
1-1.5 cup(s) soy milk
1 vegetable stock cube (dry, not diluted in liquid, I use Knorr Pots)
1 good pinch sea salt
Ground black pepper (I'm generous with mine)
1/2 tsp dried oregano
1/2 tsp herbes de Provence
2 tbsp EVOO
2 tbsp white flour

Essentially, everything goes into a blender and is blitzed till smooth, nothing more complicated than that.  I started off with one cup of milk and added more as needed, I was looking for a double cream consistency.

You could follow the original recipe and make a flour roux, but I didn't want to be using a warm Bechamel sauce (the lasagne was being in made advance and with cold chilli) and I was too impatient to wait for it to cool.  Adding the flour to the blend and letting it cook through on a low oven for 40 minutes worked perfectly - I preferred it to my first attempt which had followed the original recipe.  The addition of a stock cube to the tofu does wonders for the flavour, something that I wanted to enhance with the herbs and pepper.  It also cooks well, and whilst you don't get the traditional cheese laden top, the gorgeous gooey white sauce/mince mix is still there and, in this case, made all the more moreish thanks to the subtle heat of the chilis and gorgeous rich, smoky sauce.

This is one recipe definitely worth a try :o)

Friday, 20 September 2013

DIY Halloween Ecard Invitation - A Tutorial of Sorts

This year I wanted to send an ECard Invitation for Halloween.  I did an invitation a couple of years back that was on a CD, but this one I wanted to be able to email and play as a movie.

This is the final invitation. I've embeded it in a Photobucket player, the resolution is a better than Blogger's own video tool but please be patient, it may take a little while to appear... and ignore the play button in the top left hand corner (doesn't always work) in favour of the one in the bottom left hand corner (which does always work).  In case you're asking why I bothered... you should have seen the resolution from Blogger, it was worth it, I promise!


So, what do you need?  It's pretty simple: an image, preferably editable, and/or editing software; Microsoft Powerpoint and and music saved in a .wav format.

As there is no need to specify the theme this year, I decided to focus on the idea of a haunted house and graveyard instead and got the look just right with this great background (one of a series of Vectored Posters free to download on the Vector Graphics Blog) with its quirky, colourful and naive styling.  Having selected it, I opened and edited it in Adobe Illustrator; removing the original text and selecting the layers that I eventually wanted to animate.  I then saved a background file, which only included the imagery that would not be animated:


and each of the layers for animation separately.  They were saved as interlaced .png files and looked something like this:

The eyes from the Grave Monster, so that they can flash  spookily!

The skeletal hand that rises from the ground.

One of the series of bats that flies in.
Finally, in AI I created the three lines of text for the invitation in three separate layers and saved each one separately, again as an interlaced .png file.  I only wanted to animate each line, not individual letters.

The fabulous Mary Jane deGroot from Apostrophic Labs.

Once everything was saved, I moved into Powerpoint and inserted the background into a new slide; fitting it to fill the screen.  Then comes the fun part... animating the various parts in Powerpoint.  At this point I should say, I will not be telling you how to do that!  I wouldn't know where to start and there are plenty of very good tutorials to be found on the interweb that will help you far more than I could.  What I will say, is that the animation had to tell a story: the eyes flicker spookily, smoke rises from the house, a colony (or cloud, for those of you like me who like their collective nouns) of bats fly in and a lone skeletal hand rises from the ground as you are invited.... See what I mean?

One I'd started to tinker with the animation, I knew that I needed some sound effects or music and after a couple of attempts at thunder and haunting laughs, I struck gold with the first 30-odd seconds of the soundtrack to Dark Shadows.  The laugh at the beginning and the overall eeriness of music were exactly what I was hoping for.  As I only had an mp3 file I converted it here to a Powerpoint friendly .wav file.  Now, again, no tutes here from me about adding music to a Powerpoint presentation but I will say that the 2010 version impressed me. I  have not played about with adding music in any of the previous versions so maybe I'm horribly behind the times, but I could edit and tinker and fiddle all I liked and needed to.  Happy Halloweenie Bunny (oh! costume idea!?)

The final job was to create a video.  Again Powerpoint 2010 proved its worth here as under the Save & Send options you can Create A Video, easy.


Once selected, you have various options.  As I was winging it (pardon the pun) I decided to chose the option to record the timings.  The program plays your animation for you, you click to start the record and again to end it... I just wanted to be utterly certain of what my viewers would see and hear, and when the movie would end.


Then you create your video, it's as easy as that!  As it defaults to a Windows Media File, I used my converter tool from earlier (here, it really is very useful, converts most things to most other things) and converted it to any formats necessary (ie mp4 for my iPhone friends).

One Halloween Ecard Invitation, done.  

Thursday, 19 September 2013

Thistles... I think?

Spotted these walking the furbys.  At first glance, it was just a weed on the edge of the field. On closer inspection, it is really rather beautiful.


Wednesday, 18 September 2013

Finn's World, part 2

It's been a while since I last looked at the world from little Finn's point of view.  In fairness to us all, lots of photos of Finn and grass wouldn't be the most interesting of things to see. Grass, after all, is grass.

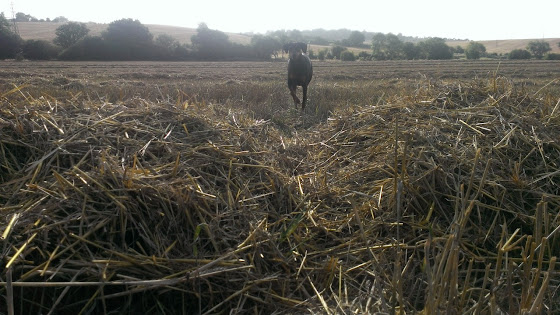
We have, however, recently had the harvest.  I say "we" and obviously mean the nameless, faceless owner of the land that surrounds our little home, but it has such an impact on our daily walks that it feels far too personal not to be a "we".  Since these photos have been taken, for example, the field has had it's first plough and is an impassable mass of giant sods of earth.  It will be a good few weeks before we can stretch our legs across it again.  But I digress.

Harvest = a field dissected by row upon row of hay (?) and whilst Megs and I simply stepped over, Finn was faced with an obstacle course.  Ever the loving mother, once I had stopped my laughing, it was time to take a few shots.

Here comes Finn.

And here comes Megs!
Finn was loving it...
occasionally he'd be defeated...
but mostly he just cleared them in style!
And yes, go on... double click... it's worth the close up! ;o)

Tuesday, 17 September 2013

Google+? Meh!

Well I've done it, I give up on Google+, especially as there is absolutely no way round the "no-reply blogger" debacle other than to go back to the old ways.  My "limited" blogger profile is restored... gotta love the irony.  There are various posts floating round the interweb on how to switch back but my personal favourite was from Venus Trapped In Mars, who can resist a super happy squirrel! 

Now if I could only figure out how to restore my reading list without adding everyone back in again, I would be a truly happy camper... if anyone knows, please help!

Saturday, 14 September 2013

How to spend a Saturday afternoon..

Plan A was a couple of jobs and to sort out the chooks. Plan B... I make a great bed!


Saturday, 7 September 2013

A new look for MMM....

it was time for a change and I do hope you like the new look, I've certainly had a great time designing and geeking!  I had wanted to expand last year's Christmas card design to include us all (though I've still not found a place for the chooks....) and I love the new photo slider.  

I have a couple more tweeks, but it's nearly 1am and even the dogs are looking a little desperate!

G'nite everybody x

Tuesday, 3 September 2013

Baked Spinach and Artichoke Dip goes Vegan

Thanks again to France, where I was eating lots of artichoke hearts in my salads, I decided to try and veganise a firm favourite of ours, Baked Spinach and Artichoke Dip, to take to a BBQ that we were having with the B's.

It was the lovely Mrs B that first introduced us to it, following a holiday in Florida, and her dip is legendary. Truly, legendary. I couldn't hope to emulate its glorious melty-cheesy-tasticness, but I was pretty certain that I could create a good alternative, especially now that I have got the whole Sour Cream thing nailed!  I googled a few recipes and settled on a version of one from Fettle Vegan, which goes something like this:

Ingredients:
1 piece whole wheat bread
1 tsp vegan butter
1 medium onion, finely sliced
1 tbsp EVOO
1 can butter beans, drained and rinsed
1/2 cup tofu based sour cream (follow the link above)
1/4 cup water
1 tsp seasalt
1/4 tsp dried basil
1/8 tsp red chilli flakes
6 clives garlic, minced
4 good handfuls baby spinach
1 can artichoke hearts

I preheated the oven to 180C.  

In a blender I blitzed the bread and vegan butter, then set aside in a bowl.  Back to the blender, I added the beans and blitzed them till mostly smooth, before adding the water, basil, chilli flakes and 3 tbsps of the sour cream and blitzing to combine.  In a large, non-stick frying pan, I added the EVOO and onion and cooked for 5 minutes, added the garlic and cooked for another couple and then added the artichokes.  These I did not pre-chop, but broke down gently into halves or quarters (size depending) with the back of my wooden spoon as the heat worked its way through them.  Then I added the baby spinach and cooked through till it had wilted.  I took the pan off the heat, stirred in the bean mixture, 3/4 of the bread crumbs and the rest of the sour cream.  This was then transferred to a baking dish (I have a 6" round, 6" deep dish which is just perfect) and topped it with the last of the breadcrumbs.

I baked this in the oven for 20 minutes before going to the B's and another 15 once we were there.

As it was, Mrs B had made a dish too so we had a bit of a dip-off!  Dip chips in hand, the lovely boyf nominated himself "Chief Taster" and set about the challenge with gusto.  It's safe to say that I didn't embarrass myself.  Paraphrasing badly, his review went something like this: "Darling, this is good!  Full of texture and you can taste all the different flavours." The "Mrs B, yours is just..... GREAT!", complete with smacked lips and a touch of salivating, said it all however, I did not manage to match the gloriousness of her melted, stringy-cheese-filled magic dip!  

As with all things vegan, especially if you don't try to include a cheese substitute, it's never going to be an exact match.  This is however, a lovely nod to the original.  I deliberately tried to maximise the texture and flavour and I was very pleased with the results.  Yep, Mrs B wins hands down when her dip is sharing bar space, but it was unanimously agreed (by 5 self-confessed Mrs B dip addicts (myself included)) that this could stand beside it and, on its own, wouldn't be refused either.  I call it a win ;O)

Neither lasted long enough for a photo either... I'll have to make another bowl; BBQ anyone?

Pickled Garlic, a little taste of France

If I had to list my five favourite ingredients, garlic would be there, probably in the top three and one of the real treats of our little trip to France last month was a pot of pickled garlic cloves that I picked up at the market.  Home and unable to find anything comparable, I decided to make my own.  The recipe is based on this, with a couple of changes as I wanted to try a sweeter pickle juice.


Ingredients: enough for a jam jar's worth
1 cup white wine vinegar and Asda's Apple Dressing (a lovely blend of white vinegar, white grape and apple juices) - approx. half a cup each
1 cup dry white wine (I chose a "crisp and fruity" Italian Trebbiano Rubicone)
A pinch each of red chilli flakes and herbes de provence
1 pinches each of dried rosemary and sea salt
2 dried bay leaves
10 whole peppercorns
3 tsps of granulated sugar
4-5 bulbs of garlic

The jam jar was washed and steralised in the oven (100C for 15-20 minutes and left to cool) whilst I peeled my cloves... which reminds me, I learnt a lovely phrase in France; "en chemise" which means "unpeeled" but which I couldn't help but think of quite literally, and couldn't help but laugh, as I imagined lots of little prawns (which were on the menu at the time) or in this case, garlic bulbs, in their undergarments!  It is the kind of job that gets equally tedious and addictive but well worth the effort.  Into a heavy based pan I put all the other ingredients, brought it to the boil for 5 minutes and then put the garlic in for another 30-40 seconds.  The garlic and pickling juice were instantly transferred to the jar and left to cool before being put in the fridge.  I tried a piece before I put it in the fridge, soft on the outside and crunchy in the middle; I prefer my garlic soft all the way through so will have to see if that comes with time and absorption... I have a week or so to wait.  I have since seen other recipes that cook the garlic for longer, the perfect excuse to try again if these are not quite as I would like!  

Yes, I misread the recipe and picked the garlic out again!

In the meantime, the leftover pickling juice makes a lovely light and fragrant salad dressing, an unexpected secondary treat.

Monday, 2 September 2013

It's time to stop being a fool!


“If at first you don't succeed, try, try again. Then quit. No use being a damn fool about it.” 


So said my calendar last month.  I laughed when I first read it but it proved to be good advice,particularly for someone who doesn't like to give up.  I'm quite pleased to have turned the page: all I need to do this month is laugh at myself and I do that already, as a good friend once said, "you can't be our kinda crazy without laughing about it!"

And so it is, with August's wise words echoing about the brain, that I have decided to call it time on the Mermaid costume as it currently stands.  It has been wonderful, but deeply frustrating, project from the day I started and it feels like it has fought me all the way.  With only a few weeks to go and left feeling, once again, as though I'm going backwards, not forwards, I am calling time on it.  Life is too damn short to be swearing at my sewing, it's my "go to" not my "get away from".

The nail in the costume-coffin was a disastrous afternoon this weekend spent trying to make the pannier hips which would have started the skirt.  After three attempts, the second of which involved 2 broken needles and a damaged bobbin case (all the same incident, I managed to leave my seat and duck at the same time) and more wasted fabric, boning and materials than I care to contemplate, the only good thing I can say about the experience is that my sewing machine finally got a much needed mini-service.  I was left with one pannier, that looked like I'd thrown it together (truth be told, by that point, I pretty much did) and just didn't/couldn't/wouldn't follow the line I was trying to create.  I was getting grumpy and when the lovely boyf stuck his head above the parapet and dared ask if maybe I shouldn't stop for now, I realised that yep, it's time for me to stop.

So I have a blue wig, a bag of blue fabric, shells and other assorted wotnots, and a lingering desire to still make it as a Mermaid in time for Halloween.  For now though, I'm going to listen to Mr Fields, have a good chuckle with myself, take a couple of weeks off and, for Round 2, the strict instruction will be to "keep it simple".