Showing posts with label card making. Show all posts

Friday, 20 September 2013

DIY Halloween Ecard Invitation - A Tutorial of Sorts

This year I wanted to send an ECard Invitation for Halloween.  I did an invitation a couple of years back that was on a CD, but this one I wanted to be able to email and play as a movie.

This is the final invitation. I've embeded it in a Photobucket player, the resolution is a better than Blogger's own video tool but please be patient, it may take a little while to appear... and ignore the play button in the top left hand corner (doesn't always work) in favour of the one in the bottom left hand corner (which does always work).  In case you're asking why I bothered... you should have seen the resolution from Blogger, it was worth it, I promise!


So, what do you need?  It's pretty simple: an image, preferably editable, and/or editing software; Microsoft Powerpoint and and music saved in a .wav format.

As there is no need to specify the theme this year, I decided to focus on the idea of a haunted house and graveyard instead and got the look just right with this great background (one of a series of Vectored Posters free to download on the Vector Graphics Blog) with its quirky, colourful and naive styling.  Having selected it, I opened and edited it in Adobe Illustrator; removing the original text and selecting the layers that I eventually wanted to animate.  I then saved a background file, which only included the imagery that would not be animated:


and each of the layers for animation separately.  They were saved as interlaced .png files and looked something like this:

The eyes from the Grave Monster, so that they can flash  spookily!

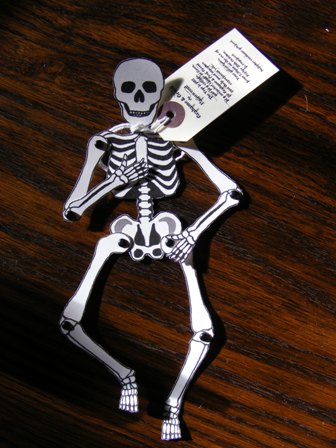
The skeletal hand that rises from the ground.

One of the series of bats that flies in.
Finally, in AI I created the three lines of text for the invitation in three separate layers and saved each one separately, again as an interlaced .png file.  I only wanted to animate each line, not individual letters.

The fabulous Mary Jane deGroot from Apostrophic Labs.

Once everything was saved, I moved into Powerpoint and inserted the background into a new slide; fitting it to fill the screen.  Then comes the fun part... animating the various parts in Powerpoint.  At this point I should say, I will not be telling you how to do that!  I wouldn't know where to start and there are plenty of very good tutorials to be found on the interweb that will help you far more than I could.  What I will say, is that the animation had to tell a story: the eyes flicker spookily, smoke rises from the house, a colony (or cloud, for those of you like me who like their collective nouns) of bats fly in and a lone skeletal hand rises from the ground as you are invited.... See what I mean?

One I'd started to tinker with the animation, I knew that I needed some sound effects or music and after a couple of attempts at thunder and haunting laughs, I struck gold with the first 30-odd seconds of the soundtrack to Dark Shadows.  The laugh at the beginning and the overall eeriness of music were exactly what I was hoping for.  As I only had an mp3 file I converted it here to a Powerpoint friendly .wav file.  Now, again, no tutes here from me about adding music to a Powerpoint presentation but I will say that the 2010 version impressed me. I  have not played about with adding music in any of the previous versions so maybe I'm horribly behind the times, but I could edit and tinker and fiddle all I liked and needed to.  Happy Halloweenie Bunny (oh! costume idea!?)

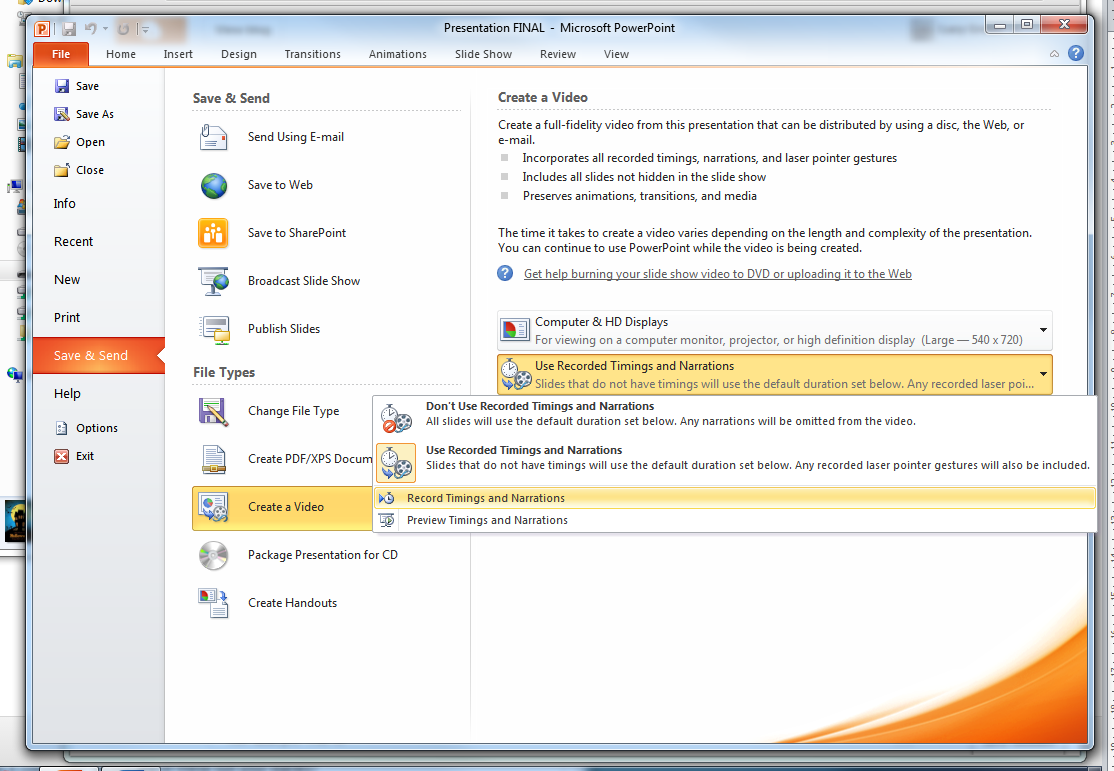
The final job was to create a video.  Again Powerpoint 2010 proved its worth here as under the Save & Send options you can Create A Video, easy.


Once selected, you have various options.  As I was winging it (pardon the pun) I decided to chose the option to record the timings.  The program plays your animation for you, you click to start the record and again to end it... I just wanted to be utterly certain of what my viewers would see and hear, and when the movie would end.


Then you create your video, it's as easy as that!  As it defaults to a Windows Media File, I used my converter tool from earlier (here, it really is very useful, converts most things to most other things) and converted it to any formats necessary (ie mp4 for my iPhone friends).

One Halloween Ecard Invitation, done.  

Thursday, 1 December 2011

The Boyfs Advent Calendar

It's the first day of Christmas and I can finally show you one of the little Christmas projects that I've been working on, an advent calendar for the boyf.  I can't say too much, as he does read my blog :) but it starts with a hint as to how many days he has left to buy my present!  (though I have to admit, he's beaten me to it this year...)


The front and back panels of the calendar were put together in Photoshop, using a Mari Koegelenberg template from The Digichick website, some beautiful Karla Dudley fonts and brushes and a snowflake brushset that I am just in love with.  I cut a template for the top flaps and used that to cut the top layer, the template had the fold lines printed.  Then I double-sided taped each and every line, I didn't want any gaps or lifts, and held my breath as I matched the top and bottom layers.  It was then mounted onto a sheet of A4 black card, I printed a title panel for the side and detailed with some matching gosgrain ribbon.  I'll post some more pics of the bottom layer later in the month.

Thursday, 7 July 2011

Songbird Card

I need a card for my mother's birthday and as I thought I might have time this afternoon I played with an idea I've been thinking about for a couple of days now.   

I took a simple silhouette of a bird cage, traced it and pinned it to a piece of shot silk from the scrap pile.  Using very small stitches, and most of my patience!, I sewed around all of the traced lines.


All the time I thought I had disappeared quicker than I could keep track and stupidly I forgot to take any real photographs, but it's a simple, if fiddly little card!  Once sewn I tied off all the threads, trimmed round all the edges and cut out the silhouette, lightly distressing the edges as I did so.  I then cut a rectangle out of a contrasting cotton, glued and sewed it onto the card front and then glued on my fabric birdcage.


I cut a bird out of a piece of navy canvas and glued it on top of the bird cage (my songbird has escaped!).  A seed bead makes a good eye and a row of beads a chain from which my bird cage hangs.


I'm pleased.
I'll try to remember to take a good photo tomorrow before it goes in the post!

Saturday, 4 June 2011

Halloween Invitations.. made and in the post

Halloween this year is going to be special.  Fancy dress as ever, but a small gathering rather than a large party.  It's based on dinner nights that the boyf and I started hosting just after we met, the Grahame & Green dinners, a chance for us to flex our culinary muscles and host a perfectly planned evening with lots of lovely touches.  We've not had a G&G for ages and so this seemed like the perfect opportunity to flex our rusty cooking muscles!

The invitations needed to be sent out early, to guarantee numbers and let me tie up a few more details too ;o) and so they had to be good and memorable.  As my Victorian costume is for Halloween we were looking at a period themed party, but I wanted to give people options as well so it could just as easily be Frankensteinian or a little Rocky Horror.  I also wanted to use skeletons as my main motif this year.  So, I decided on little skeleton messengers, posted in their own coffin... Gothic but not too scary!

The skeleton I found on Ben & Jerry's website (they're not only good for ice-cream!) and printed him off onto  sheets of thick white card.  Ignoring the ice-cream toting limbs (sorry B&J) I cut out the skeletons and joined their limbs with 4.5mm black round head brads.

The wording for the invitation was printed on to mini luggage tags and tied around the skeleton's necks.  To put the text onto the tags I printed it onto clear labels, deconstructed the tags, stuck the labels on each side of tag, trimmed them, repunched the holes and then put the tags back together again, gluing on the hole reinforcers and retreading the ties.


I won't say it wasn't a lot of work, but they are worth it!  The font, Bleeding Cowboys, is wonderful and reads so well, even at 6pt.


The text reads:
Grahame & Green do Halloween! 
The Year is 1882 and in a cottage, in a secluded village in Essex, 
Dr Grahame & Prof. Green plot their most macabre experiment yet... 
 Your attendance, from 7.30pm on the eve of Friday 28th October, is required. 
Suitable costume advised.

The scene is set....

I then moved onto the coffins.  Tracing a basic shape from a book, I made three templates; the base, the lid and the lining.  You can download the template here; print at 100% on A4 paper.  The base is 10mm deep, the lid is 3-4mm longer and wider than the base and 5mm deep, the lining is 2mm shorter and narrower than the base.


As I wanted black coffins, I couldn't print the template onto the card so I traced it instead.  I used an awl to pin prick each point in the card and then joined the dots to redraw each piece.


Once cut out, I folded each line against the ruler for a smooth, sharp crease, and glued the tabs.  I decided to line each coffin in a fabulous corrugated red card that I found.  I cut lengths 8mm wide trimmed them to length (the circumference of the internal measurement of the coffin) and glued them in place.  I then glued in the inner lining.  The lids, at 5mm deep, I decided were too narrow to line.  I had originally wanted to use double-sided tape but was not having any luck; the shapes would start to come apart.  I then I found an old pot of craft glue in the garage; thank goodness for fast-drying craft glue! 


Finally I found/Photoshoped a variety of luggage labels and stickers, and a stamp.  I printed them onto some white labels, cut them out and decorated the coffin; this is a well-travelled skeleton!


I hand-wrote the names on and packaged the coffin up in a length of red embroidery thread.  
All ready to go...

Materials:
A4 card (120gms or more, depending on your printer) in White
A4 card (heavyweight) in black and red (corrugated or textured if possible)
Luggage tags
Avery Labels in clear and white
4.5mm round head black brads (8 per skeleton)
Red embroidery thread or string
Good Craft Glue
Scissors, ruler, awl or sharp pencil, pencil, black pen, hole punch

Sunday, 15 May 2011

Halloween Invitations

The Halloween invitations were proving problematic; a little too small and fiddly to stay as they should.  I redrafted the pattern, worked out the kinks and built prototype #2... and then the boyf appeared, made a suggestion that is in equal parts annoying and too good to ignore and prototype #1 has reared it's fiddly head again.. Except that this time I have to make it work, hmmmm....

P.S. sorry hon, but it's your own fault that the ironing didn't quite get done! ;o)

Thursday, 12 May 2011

the Joy of repetition

The Halloween invitations comprise 72 pieces (for 6 invitations), which all need to be handcut, and this is just to create the basic invitation.  There will then be roughly another 6 embellishments, I'm thinking, per invitation before they are finished.

Following a pretty dire day at work, I took myself off shopping, bought the necessaries and spent a very happy evening starting to cut out some of the pieces for the invitation.  As I did so, I mused, and pondered, and chatted to the boyf, and thought, paid scant attention to the TV, and found myself gently unwinding from the day whilst peace was restored to my psyche.  Be it a brush stroke on canvas, a stitch in thread, a bead or button sewn, even the letters that I type now; repetition is at the heart of creativity, and for me, the repetition of a creative action is when I relax and find my peace.  It is my personal meditation and prayer.  

In learning something new there can be excitement but anxiety; in repeating the action, there comes mastery, confidence and efficiency.  That in turn quietens the mind and, at that moment, opens it up; you can look at what is around you, see with fresh eyes, think with increasing clarity as the momentum of your actions builds, be free to allow your creativity to flow anew.  A work takes on "a life of its own" or, as one project is taking shape, the mind will brainstorm new ideas endlessly. 

I think that most creative people would agree with me?

It flows into other areas my life too.  I like to clean (particularly calming when I feel overwhelmed) and love to cook; washing up is far more pleasing than drying and putting away (too many variables!); each step of my walks with the dog, following the same paths and seeing what is new; and whilst tumbledrying is a sad necessity, I love to hang washing on the line: dip, pick, hang, peg, dip, pick, hang, peg... and look, the sun is dancing through the laurel tree's leaves.

Tuesday, 10 May 2011

I'm feeling a little deflated

after all the excitement, and elation, of finishing the corset! Though it has been lovely to read, hear, all of the wonderful feedback :)

I want to start the dress but to cut the pattern I will need to monopolise the dining room for a day, so I'm being very impatient until the weekend... And in the meantime, Halloween!, I started on the prototype for the invitation today; I love prototypes they really get me thinking and I've had some great new ideas. They'll take a while, but these invites will be fun.

Oh, and I also made an important purchase... :)

Sunday, 8 May 2011

Happy Birthday Mrs B!

I do hope she has a good one!

My current obsession with alliums continued to her card.  I drew a stylised flower in silver on a 5" square cream card, punched holes through with an awl and sewed on seed beads.  I originally planned for a complete silver colour scheme, but thanks to a beautiful selection of beads that my mother had given to me, I changed my mind and used various shades of purple, blue and green.


Mrs B's birthday present was a beautiful little cake stand; which the 9 yr old and I filled with home-baked cupcakes; Strawberry Cheesecake and Marshmallow :o)   I covet the cake stand... but Mrs B will do so much more with it than I would!  We couldn't exactly wrap it, but it looked pretty enough all the same.

Tuesday, 3 May 2011

These are dangerous times

because as I sit here, high on the buzz of far too little sleep since Sunday (thanks to time zones, the selfish elbows next to me on the flight home and a very ill 9y r old ) and with a whole evening to myself ahead of me, by brain and fingers are twitching dangerously! 

I have fabric, and patterns and Halloween invitations to make; a corset to finish and another on it's way; a blog to update, garden furniture to paint, a bday card for the lovely Mrs B to make; and another 200-odd NY photos to sort through and upload.   The temptation to run on home and start on them all at once is itching away at me; given half a chance I would happily sit up all night.  But as I've had 6 hours sleep in 54 and another 4 ahead of me before I can go to bed (and not be woken half the night by a restless dog!) I know I need to be calming the storm and getting ready for a good nights sleep... Not stirring things up with plots and plans!  In an ideal world I could just take the next two days off and stitch till the costume was done... As it is I am going to have to behave, prioritise, finish the corset before even touching the costume pieces and resist the oh so twitchy fingers!

Thursday, 28 April 2011

Miss K's Corset Card...

It's Miss K's birthday this weekend... the girls and I, in a moment of madness, decided that we'd make her a corset one weekend: a present-girly day in-bit of a laugh all round-in-one present. So, to get things started we decided that she'd need to get measured up... a job for the boyf, not us!


The card is meant to look like an old pattern packet, with instructions inside and a tag tied onto a ribbon bow to close. I wanted a naughty but nice, vintage look for the card, envelope and measuring instructions. I deliberately mixed up various baroque elements, handwritten and ornate fonts, as I wanted a classic feel which wasn't too perfect. I'm pleased with the results and delighted to say that Miss K was very pleased too.
Related Posts Plugin for WordPress, Blogger...
© Lucy Green. Powered by Blogger.