Showing posts with label corset. Show all posts

Sunday, 24 March 2013

Alchemy!

Or as Lord Percy would say, "Can it be true, a nugget of purest Green?"!

I had a fabulous time yesterday with a teaspoon of bicarbonate of soda and my cabbage dyed fabrics.  It was the stuff of witches' cauldrons; just one teaspoon dissolved in approx. 4ltrs of simmering water had an instant, and very lively, effect on my mauve.  It also smelt, overwhelmingly, of cabbage!


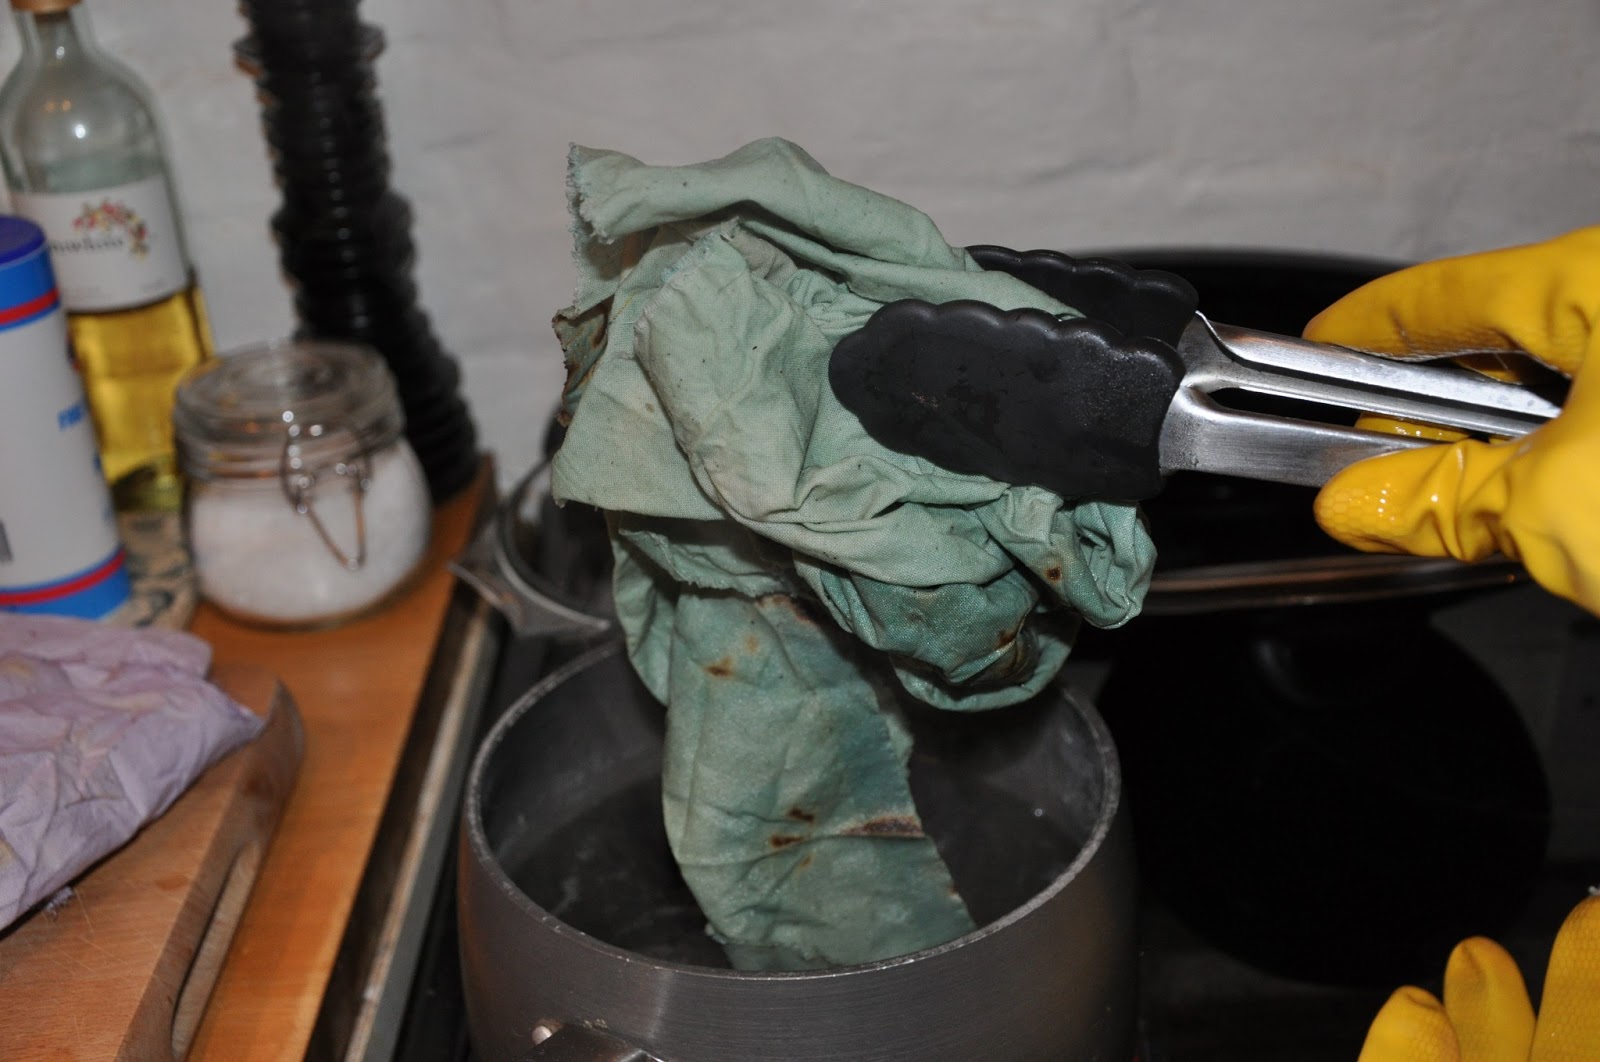
This morning, following the ironing (every bit of fabric work at the moment seems to be preceded by at least an hour's ironing...) I pressed the fabrics; which are still smelling (though slightly fainter maybe?) quite distinctly of cabbage!  I still do not have my blue, the fabric did not sit in the initial dye long enough I'm guessing, but instead a beautiful green which, sadly, is not photographing anything like its true colour.  It is a beautiful, and rather apt, sea green with, as the photo below shows, a lovely whorl of blues on the linen piece.


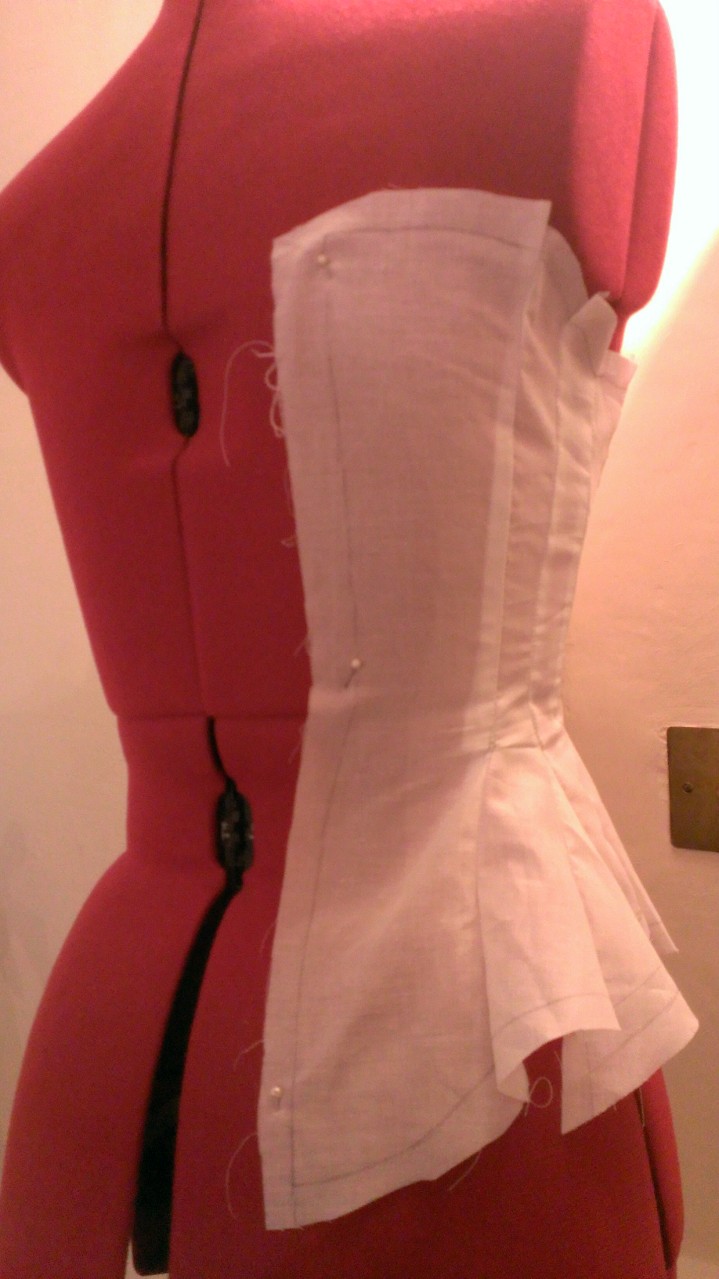
One of the joys of natural dying, I'm discovering, is the rather magical unpredictability of it all. It is also possible to keep playing with the same piece of fabric, I'm guessing, and the only time to stop is either when you're happy or you've gone too far in the wrong direction!  The linen, whilst not blue, is a beautiful colour and I am tempted to use it for the corset.  I do however still have the two cottons, neither of which have absorbed the colour like the linen and which I think I will play with further.  I'm tempted to try red onion this time, anything to escape the smell of cabbage! and to mix maybe half a teaspoon of bicarb into the dye before I add the fabrics.

As I've been playing, my ideas for this corset are becoming far more organic than the original "halloweeny" intention.  With so many individual pieces, I think there could be some lovely playing with colour and texture and vegetable dyes seem to have a natural affinity for working well together.  The three fabrics now are quite different colours but, tonally, match perfectly.  If I'm careful, I think there could be a little magic to be worked here, and the starry night effect that I was originally looking for, and would still love to achieve, could be added with paints, sequins and bead work.

But I'm getting ahead of myself, and learning with this project, that it does not seem to like being pinned down at all!  We are away for the Easter weekend so I will have to wait till I return and then we will see what colours come next.  In the meantime, a little light holiday reading will involve learning the theory of cording the corset... eek! 

Monday, 18 March 2013

Hummmm....phf!

Yes, well, it didn't quite go to plan.  My fabrics are still, resolutely, mauve... and the burnt bits look even more burnt than ever.  Less nebula, more disaster!


except where it was resting on the rather beaten up, uncovered metal bit, of my rather beaten up airer.  Then it's a tiny hint of slightly aqua blue.

But I've been doing my homework, apparently bicarbonate of soda does the trick.  I'm going to reboil of these in a solution of it as a test, and then I think I may have to start this whole experiment from scratch.  It's rather good fun though, I'm rather enjoying the random experimenting of it all!  


And I found this... a top that I bought a couple of years ago, two sizes too big, just because I loved the colours of the sequins.  I think it has to find a home on the corset, somehow, somewhere...

Sunday, 17 March 2013

Colour for the Corset

It has been crazy busy lately, and I just have not been sewing... but I have been thinking about the corset - mostly thinking that I will just never get it done! - and it's lead me down some new and interesting paths.  One was that I should try dying my own fabric using a homemade vegetable dye.  It took a couple of hours and then I left it under the boyfs' supervision for 20 minutes and it looks as though I might have to start again!  Not that I'm going to completely give up on my efforts just yet, I'll wait and see how they dry out first.

I decided on red cabbage (and a red onion that would otherwise go to waste) which was chopped up to a medium dice and put on to simmer in a large casserole pot for about an hour.  I then added my fabrics (a white cotton, a white linen and some cream canvas - all offcuts) to 4 parts water and 1 part white vinegar and brought them to simmer for an hour.  Once the fabrics were done I rinsed them in cold water until they ran clear and squeezed out the excess water.  I lifted the cabbage and onion out of the dye (it'll be a perfect treat for the chooks) and put the fabrics in to simmer for another hour under the watchful eye of the boyf... in theory... this is where it all went wrong? right? as 20 minutes later I came back to the smell of burning!  The fabrics are probably now not a keeper, but I'm going to let them dry and see what comes of it all. In theory my mauves should be blues and the burnt areas (after I'd finished huffing and puffing) made me think of nebulas and galaxies.   It's either that or the chooks will soon be eating a lot more cabbage!


We'll see....

Tuesday, 1 January 2013

The 1873 corset continued...

Well, I've had the lurgy!  Woke up Boxing Day with itchy ears and it all went downhill from there... good thing about the enforced rest though is that I have had plenty of time to think and google, plot, play and plan the new corset.  And, I made a great discovery, the beautiful Before the Automobile blog and, in particular, an amazing version of the 1873 corset; oh, to have even a smidgen of M's talent.


In addition to being a very talented seamstress, she is a generous lady who answered my email full of questions about redrafting Norah and it's construction.  Armed with her tips and advice I, very randomly, found myself making my first muslin mock up yesterday.  It was all very unplanned and haphazard, no planning or photos etc., and I spent the majority of the time telling myself that you can't just suddenly decide to mock up a corset as intricate as this with no planning or real forethought (on New Year's Eve no less) and it not be an utter waste of time... I was a lucky lady, the fates were on my side.

The corset is surprisingly easy to sew together, not construct - that will be a whole other story, but piece together based on the annotations on the pattern.  I was expecting some serious head scratching but, apart from the obvious amendments that I still need to make to the pattern, it was nice and straightforward.


Based on M's advice, I lengthened the corset but decided not to add anything to the the width and, as it happens, the front of the corset fits perfectly.  I will need to add approx. 2" across the back, which I will divide equally across the side and back panels.  What was immediately obvious was that the panels on the bottom that form the shape of the hips need to be adjusted.  The front one, which should be a single, sweeping piece, I had to extend and will need to redraft.  I also need to lengthen a couple of the other panels and, am thinking of extending them all a little more as I am looking for quite an exaggerated shape.


As I pinned the mock up to Miss G I made notes on the main pattern, measuring and redrafting as I went along.  I will then unpick the mock up, add in the new pieces and, with any luck, have a finished pattern within a couple of attempts.


In the meantime, I have filled an Evernote notebook with web clippings of various fabrics. What was immediately obvious, from M's corset, was that the cording would not work with my original idea of a canvas top layer.  I have been looking at different, softer canvases and also at Aida's but also found, in the googling, some rather lovely fabrics and am now utterly undecided as to what to do... I feel some sample ordering coming on.


Sunday, 23 December 2012

The Starry Night Corset

I have decided on a name for the corset for the Selene costume, thanks to Mr Van Gogh (though it has already been nicknamed Norah!), and have started on the pattern.  The reproductions in Corsets and Crinolines are to scale, and in the first instance I have transposed that onto tracing paper; my first thought, it's tiny!

The scale on the pattern worked out to 6mm = 1".  


With a little maths, some light graffiti in my book and a little artistic license, in about an hour I had a pretty faithful reproduction of the pattern in the book.


Now, with a restocked glass of red, I am working my way through Appendix 1 and annotating like crazy.   Norah Waugh gives a fascinating account of how to construct a corset, mixing instruction with contemporary quotations and historical detail.  I did not know before, for example, that modern women's backs are broader as we have not worn corsets since childhood, which narrowed the shoulder blades and, what a bonus, caused "greater development" of the bust to occur - if only I'd known that sooner!  The suggestion is to make the corset two inches smaller at bust and waist, the next step is to measure myself and redraft these larger pieces to my measurements; great time of year to do this, just as I'm about to tuck into a Christmas dinner or two!  That might have to be 3" smaller and a workout or two in the new year ;o)

Sunday, 8 May 2011

And its done!

The alterations went really well, I was done within an hour, and throughout the day I have been stitching on the binding.  I also added a label on the inside and embroidered my initials on one of the panels.  I have chosen a "rabbit ear" lacing to finish.


The front panels match very well and I love the play of flowers and skulls with the swirl of the snake's body going round mine; it has a real vintage tattoo feel to it, which is exactly what I wanted.  My Victorian costume will be accurate and in keeping with the period, but I couldn't resist this little Gothic touch hidden underneath.

I have built my first corset and I love it.

In the meantime, the 9 yr old picked the pattern for her Halloween costume, Simplicity 5042 Costumes For Kids, out of print and finally tracked down on eBay...

The Corset... adjustments...

I finished the second half of the corset last night, bar sewing the binding on; my fingers said no!  But was very pleased with how quickly it came together.  I pinned on the binding, laced it up and tried it on and as the laces were tightened, at the top of the corset the eyelet tapes overlap... I was too conservative when I made the deduction from my measurements.  Every time I've tested it, it seems to have been fine; I didn't realise just how much more the laces could pull you in.

I could leave it, it's a very small overlap, but it just wouldn't feel right.  So today's job is to unpick the eyelet tape from both sides, set them in 1/2" or so and resew them.

Saturday, 7 May 2011

The Corset, starting part 2

I organised the sewing table and rethreaded the machine with real excitement this morning and then was thrown headfirst back into the intricacies of corset building trying to press a seam that I'd just trimmed to 3mm and then top-stitching at 1.5mm... maybe was a little tired for this, this morning!

Creating the holes for the other half of the busk was not easy: my awl is smaller than I need, so I started with it and then moved onto a sharpened pencil, as suggested in the bible.  They make the point that the pencil can mark your fabric with it's lead; a problem I partially solved with some clear nail varnish on the lead.  It is a struggle, no a fight, though to get the knobs through the hole, even then the pencil's pushed though as far you think it can go.  My hands were shaking and my temper short!  But it is amazing how much pressure you can put on fabric, and what you ask of it, and somehow it just takes it and then goes back to the way it was.  The first was awful, the second worse, the third a little wonky and the fourth to sixth done with brute force and a determination to "just get the damn thing done!"  ...I then sewed it into place.

I can see why people cut the holes for busk knobs (I was tempted after the first!) but the awl and pencil is rewarding if painfully frustrating.. it really is a beautiful finish.

Friday, 6 May 2011

I have a numb thumb...

handstitching through coutil is hard, hard work.  Even with a crewel sharp it took some time and my fingers are numb!  But it's done; I have half a corset and it looks good.... oh, why be modest?  It looks great!  Anyways, to bed, to sleep and then I can tackle the second half tomorrow; nothing like half of something finished to make you want to see it all done.

Corset building with Chase & Status!

When the boyf goes away I tend not to watch any of the TV we watch together and we can have a big catch up sesh once he's back; and as there's not much else worth watching out there (we're not reality TV, talent show, MTV or sports fans!) it leaves me with time to sew.  

Last night, after I'd made Mrs B's bday card (more Saturday pm) and got the little misses settled, I decided to get on with the corset and tackle the boning and eyelet trim.  Buoyed by a glass of wine and the "new" Chase & Status album, which very belatedly I am listening to in it's entirety and loving, I decided to free-style slightly and just sew, rather than study the instructions lots!   My corset building bible mentions most methods of boning, but none that show the casing on the exterior, and in addition to this I wanted to use the casing to stitch all three layers together.  Careful pining and stitching soon had the casings on and the bones in. 

I then had to revert back to bible for the eyelet trim... having realised in a small moment of panic that I'd read somewhere about putting it on before boning the corset.  Luckily, however, this is the preferred attachment for corsets that will need to be "hard-wearing"; I doubt that mine will ever qualify as such and so used option b, which involves sewing the layers together, trimming them and folding the bone cased of the eyelet trim over the edge and stitching in place.  It also "the neater finish", which glosses nicely over my possible error!  I decided to use eyelet tape with a double bone casing (one either side of the run of eyelets) for the added stability and neater look; it will match my external casings better.  Stitching it was slow going as the stitch line had to be within 1mm of the edge to fit the bone in.  I did also restitch the line, just for the added strength. 

And that's essentially it done, I trimmed the top and bottom seams and am now in the process of pinning and handstitching on my grosgrain ribbon binding...  all of which will be done to the fantastic musical whirlwind that is No More Idols, rarely does an album sound this good :o)

Tuesday, 3 May 2011

These are dangerous times

because as I sit here, high on the buzz of far too little sleep since Sunday (thanks to time zones, the selfish elbows next to me on the flight home and a very ill 9y r old ) and with a whole evening to myself ahead of me, by brain and fingers are twitching dangerously! 

I have fabric, and patterns and Halloween invitations to make; a corset to finish and another on it's way; a blog to update, garden furniture to paint, a bday card for the lovely Mrs B to make; and another 200-odd NY photos to sort through and upload.   The temptation to run on home and start on them all at once is itching away at me; given half a chance I would happily sit up all night.  But as I've had 6 hours sleep in 54 and another 4 ahead of me before I can go to bed (and not be woken half the night by a restless dog!) I know I need to be calming the storm and getting ready for a good nights sleep... Not stirring things up with plots and plans!  In an ideal world I could just take the next two days off and stitch till the costume was done... As it is I am going to have to behave, prioritise, finish the corset before even touching the costume pieces and resist the oh so twitchy fingers!

Wednesday, 27 April 2011

Does half a corset a corset builder make?

So I sat down last night to start the corset properly; sewing in the hoop side of the busk and then continuing to add panels round to the back seam.  Although I'm using Alasse's pattern, I also have a copy of How to Build a Corset which is now thumbed, annotated, post-it noted within an inch of it's life and the prospect of sewing steel into fabric for the first time in my 36-odd years had me checking, double-checking and "just checking again"! 

I started  by deciding where to place the busk, marked the openings for the busk hoops and then (wrong sides together) sewed the seam, leaving gaps where the hoops would be pushed through.  Once I actully commited needle to fabric, I was very pleased with how the coutil, canvas, fabric combination stayed together and was a pleasure to sew; though I put a sharp needle in the machine just to be sure.  The seam was then pressed open, the fabrics folded wrong sides together and pressed again.  Pins were placed where the gaps were and I sewed down the seam 1.5mm from the edge.  I unpicked and resewed a couple of the seams and will possibly do so again as I've not tied them off sufficiently and they are coming loose!  Annoying, and there is no suggestion of how to finish them so that they hold, I think I will tie them off and sew the excess thread through. 

The busk was then pushed into the seam and the hoops through their gaps.  I changed the machine foot to a zipper foot and sewed a line of stitching down the far side of the busk to hold this tight to the edge seam.  I actually sewed this twice as I didn't think that the first was close enough, and then panic un-picked the first seam, certain that in doing so I would catch the fabric and pull a thread... thankfully, all went well.

Finally, flushed with success and at 10.30pm on a school night!, I decided to sew on the next panel.  I paid no attention to anyone's instructions here and decided to sew the front and back panels on separately, which I can do thanks to my design for the corset; external bone casings that are both decorative and will hold the front and back layers together.  Careful pinning and a little adjusting on a couple of seams and I'm pleased; I was able to sew all the panels, round to the back, together in less than an hour.  I pinned a couple of bone casings onto the panels to see how they would look, but ordered 3" too short a length of casing... back to Vena Cava for some more casing and a little patience whilst I enjoy New York before I can get on with the other side....


But... I have half a corset made!! :o)

Saturday, 23 April 2011

Cutting the pattern for the Corset

According to Wikipedia: Coutil (or Coutille) is woven cloth created specifically for making corsets[1]. It is woven tightly to inhibit penetration of the corset's bones and resist stretching. Coutil has a high cotton content. Cotton has good dimensional stability, or a resistance to stretching, which makes it a good choice for such a stressed garment. Coutil may be made to be plain (similar to 100% cotton facing), satin, or brocade. It is common for coutil to have a herringbone texture, or a similar woven texture.

According to Lucy Green: Coutil is a plastic cardboard masquerading as fabric sent to scare the novice corset maker!  Beautiful, tightly woven, tiny, perfect herringbone woven fabric which doesn't look as good once it's been washed and the steam iron isn't heavy duty enough to iron out the creases again... Some serious ironing later, I had cut the first 10 pieces of my corset and was now more worried about how plastic cardboard would "fit my curves" than ever I had been about the creases... 

Too much Geisha, not enough Gothic!
10 pieces of cream canvas (I left it alone, we had no hassle) later and the third layer was my gorgeous Alexander Henry Zen Charmer, a yard of which I finally found for sale thanks to an estate sale in America. 

I first cut the pieces matching the pattern, but when I pinned them all together I had a pair of Geisha's and not much else showing.  I wanted more Gothic than Geisha, so re-cut various pieces with no pattern matching at all. 

My yard of fabric disappeared quickly with the pattern matching and what little was left I've used for the new sections.  There is nothing but scraps remaining now, but this corset is a one off piece so any spare fabric would have just sat gathering dust; it was a wasteful but useful process and in finding specific parts of the fabric for the new panels I've created an overall look that I am  pleased with.  I hate waste, but I know I wouldn't be as pleased with the final outcome if I'd not gone through the process... and the scraps will look great in a quilt one day.

                 
The Future Quilt
 
And what actually went on the bin.

Now I just have to get my head round sewing three layers of fabric (plastic cardboard) together with a bit of stainless steel thrown in for good measure...!

Sunday, 17 April 2011

The issue of space...

Moving to a house in the country is one thing, moving to a tiny two bedroom cottage with your boyfriend, daughter, doberman, cat, guinea pig, hamster and three chickens... oh, don't forget the fish... is quite another thing and space is of a premium!
Not that I'm complaining, I adore our little cottage with it's beams and graveyard and duck-to-get-through doors, and I loved the giant clearout we (ok, I) had when we moved (so very therapeutic) and the knowledge that every thing I see around me now has been chosen with care and love and deserves its place, rightly so; but when you love to do as many arty things as I do, space is of a premium.
And this is my current dilemma... The "big project" of the moment is a Victorian Costume. Having sewn for years, I rediscovered my love of sewing with patterns last year when I made a boned evening gown and bodiced Gothic Snow White Halloween costume. A Victorian costume, in all it's constituent parts, is possibly one of the most challenging sewing projects you can take on, especially if you use original patterns, and this is my challenge for this year. So, I have made the chemise (more later) and am starting on the corset. And having finally got all the pieces I need together I find that I have a bad case of "sewers block"; partly because everything is just sitting there, all pristine, looking at me, and partly because of a lack of space. Until I tidy away the current round of washing, tackle the huge pile of ironing, and return Indy's maths tutors tutoring aids to him, I am sharing the dining table (my work space) with a whole pile of stuff!
So, I'd better do some ironing then...
Related Posts Plugin for WordPress, Blogger...
© Lucy Green. Powered by Blogger.