Showing posts with label halloween. Show all posts

Tuesday, 29 October 2013

Selene... my nemesis... completed!

Halloween came a little early to our house this year and yes, I got the Mermaid costume finished, I was (finally) Selene for an evening.  

Reading back to my first thoughts on this year's project, all buzzing with inspiration and optimism, I honestly don't know whether to laugh or cry; I had such great plans and hopes and have found it, instead, to be deeply frustrating.  Giving up and starting again was exactly the right thing to have done, the wonderful Mrs B is a wise woman indeed!  It was a therapeutic and very satisfying experience and one that I found that I didn't want to blog about.  The majority of the dress is handstitched, curled up on the sofa with the boyf and the dogs, remembering, as I went along, little details about how I made the first dress and reminiscing about those first early days of falling in love with the Jedi.  It became a private process that I felt no desire to document.

That said, now that it's all done, I'm more happy to share the results and finish off Selene, once and for all! Starting off with my favourite picture of the evening, taken by Mrs S.  Blurry I know, but I love it.  It's us.


So, to start, my lovely little Starfish and Seashell tiara.  This was the second attempt as the mutts ate the first and I mean ate... demolished, destroyed.  It was touch and go as to whether I took them to the vets; happily, starfish, it seems, are not poisonous to dogs, nor bits of shell and silver plated wire... Even more happily, I had spares of everything and time in which to quickly wire them all back onto the headband.  It was a huge improvement on the bouncing silver stars I sported in 2006!


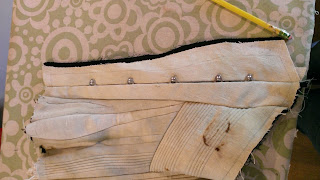
And then the dress itself.  A boned, empire line bodice attached to a gathered skirt, in the dark grey/blue sateen.  The bodice was of my own design (I may post the pattern later) and the skirt was based on the fantail skirt from the Victoria costume.  I shortened it to the point at the back of the knees where it is gathered and cut the front into a slightly deeper "V" that dropped from knee 3-4 inches.  Each panel of sateen was matched with a 1/2 as big again panel of a very soft net tulle which was gathered, stitched on and then treated as one piece.  In this way I was able to create the deep drapes and ruches without losing too much structure.  The bodice was attached to the skirt and the netting handstitched to it, first along the neckline and then gathered, vertically, along each seam of the bodice and stitched in place.  A zip was then handstitched in at the back.  The bodice is a far improved version of the original and inspired by a 50's prom dress that I have.  The front panel naturally fell into an attractive drape and so I left it as was.  The bottom, fishtail, of the skirt was a double layer of a pale blue chiffon under a iridescent, stiffer, dress net.  This was just over twice the width of the skirt hem, gathered and stitched in place.  The back half of the skirt was gathered at the back as per the fantail skirt pattern.

Green ceramic beads and silver and orange seed beads were stitched across the top of the bodice and at various points on the dress, with individual shells added in places and a rosette at the knee of sari fabric ribbon and a shell "corsage".  Again, a huge improvement on silver stars!


So that's it, before and after.  An although I have replaced my Jedi for a Vampire...


...it all worked out in the end ;o)

Sunday, 27 October 2013

What's been happening...

Goodness, it's been a long (busy!) time since I last had a chance to get my writing hat on; here's a small hint of what's been happening the last few weeks...

Designing, for me is more often than not purely for personal reasons; cards, invitations etc. but recently I've had a few external commissions and it's certainly been a smörgåsbord design-wise.  It started with a company logo which is now on their building's external signage and I can't deny its kinda cool to see your work in 40 foot glorious technicolour. Project 2 was to design some engagement party invitations and all the corresponding paper items: menus, placecards, table number cards etc.  Project 3 is a complete change of pace from florals and creams; a website for a private Respiratory specialist.  I now know more about lungs and the respiratory systems than ever thought I would, its been really interesting work.

The engagement invitations are an iron grey (coincidentally, now also the colour of my bathroom woodwork) design on a very pale cream, pearlised card. The floral design is a combination of two brushes (Blossom and Sweet Pea) from one of my favourite designers Pixels & Ice Cream - their website is definitely worth a look. All names and details have obviously been changed.

The Invitations
 
The Reply Cards

The reverse of both the invitation and reply cards

Table Numbers

Menu Cards (gorgeous menu!), each guest's choice indicated with glued on Swarovski crystal

And finally, a A4 header for additional papers (maps etc.)

The website is a completely different look.  London based, we went for a red, white and blue theme and the dark navy blue works well with the x-ray of a throat and lungs that we chose as the site's main image.  It's very simple, but clean and bold and I'm pleased to say that I have a very happy client.


And finally, in amongst all that, there has been work and coursework, lots of dogs to walk, the Halloween costume (more of that later), handmade Christmas presents and Christmas card designs, and the rather mad idea that I would redecorate around the house "just because".

Friday, 20 September 2013

DIY Halloween Ecard Invitation - A Tutorial of Sorts

This year I wanted to send an ECard Invitation for Halloween.  I did an invitation a couple of years back that was on a CD, but this one I wanted to be able to email and play as a movie.

This is the final invitation. I've embeded it in a Photobucket player, the resolution is a better than Blogger's own video tool but please be patient, it may take a little while to appear... and ignore the play button in the top left hand corner (doesn't always work) in favour of the one in the bottom left hand corner (which does always work).  In case you're asking why I bothered... you should have seen the resolution from Blogger, it was worth it, I promise!


So, what do you need?  It's pretty simple: an image, preferably editable, and/or editing software; Microsoft Powerpoint and and music saved in a .wav format.

As there is no need to specify the theme this year, I decided to focus on the idea of a haunted house and graveyard instead and got the look just right with this great background (one of a series of Vectored Posters free to download on the Vector Graphics Blog) with its quirky, colourful and naive styling.  Having selected it, I opened and edited it in Adobe Illustrator; removing the original text and selecting the layers that I eventually wanted to animate.  I then saved a background file, which only included the imagery that would not be animated:


and each of the layers for animation separately.  They were saved as interlaced .png files and looked something like this:

The eyes from the Grave Monster, so that they can flash  spookily!

The skeletal hand that rises from the ground.

One of the series of bats that flies in.
Finally, in AI I created the three lines of text for the invitation in three separate layers and saved each one separately, again as an interlaced .png file.  I only wanted to animate each line, not individual letters.

The fabulous Mary Jane deGroot from Apostrophic Labs.

Once everything was saved, I moved into Powerpoint and inserted the background into a new slide; fitting it to fill the screen.  Then comes the fun part... animating the various parts in Powerpoint.  At this point I should say, I will not be telling you how to do that!  I wouldn't know where to start and there are plenty of very good tutorials to be found on the interweb that will help you far more than I could.  What I will say, is that the animation had to tell a story: the eyes flicker spookily, smoke rises from the house, a colony (or cloud, for those of you like me who like their collective nouns) of bats fly in and a lone skeletal hand rises from the ground as you are invited.... See what I mean?

One I'd started to tinker with the animation, I knew that I needed some sound effects or music and after a couple of attempts at thunder and haunting laughs, I struck gold with the first 30-odd seconds of the soundtrack to Dark Shadows.  The laugh at the beginning and the overall eeriness of music were exactly what I was hoping for.  As I only had an mp3 file I converted it here to a Powerpoint friendly .wav file.  Now, again, no tutes here from me about adding music to a Powerpoint presentation but I will say that the 2010 version impressed me. I  have not played about with adding music in any of the previous versions so maybe I'm horribly behind the times, but I could edit and tinker and fiddle all I liked and needed to.  Happy Halloweenie Bunny (oh! costume idea!?)

The final job was to create a video.  Again Powerpoint 2010 proved its worth here as under the Save & Send options you can Create A Video, easy.


Once selected, you have various options.  As I was winging it (pardon the pun) I decided to chose the option to record the timings.  The program plays your animation for you, you click to start the record and again to end it... I just wanted to be utterly certain of what my viewers would see and hear, and when the movie would end.


Then you create your video, it's as easy as that!  As it defaults to a Windows Media File, I used my converter tool from earlier (here, it really is very useful, converts most things to most other things) and converted it to any formats necessary (ie mp4 for my iPhone friends).

One Halloween Ecard Invitation, done.  

Sunday, 11 August 2013

Fabric for the Space Mermaid costume

I found Aladdin's Cave yesterday; a shop in a little village about 30 minutes away from me that stocks the best selection of sewing and crafting goods that I have seen in years... it will be dangerous, it's already dangerous, I don't have enough hours in the day for the ideas that it's given me!

As it was, I found a great selection of fabrics for the skirt of my mermaid costume, plus embroidery flosses, beads, pre-drilled decorative shells and the most amazing recycled, ribboned sari, that I just couldn't resist.  I've matched the skirt to the wig colour (far left).


The replacement foot for my sewing still has not arrived but I am working on the patterns for the pannier hips and skirt.  I feel like I'm finally over the hump on this project and actually have an idea of where it is going!

Wednesday, 3 July 2013

"Lining" the Corset, Pannier Hips and long Blue Wigs

My bits arrived from Vena Cava so I can push on with the corset again.  I'm really in the mood for a little handsewing of an evening so I've been looking forward to lining the corset seams with bias binding.  I'm trimming each seam to 3-4mm and then slip stitching the binding in place.  

Before, during and after.
It's a lovely clean finish, so clean in fact that when I proudly showed my two the results of my work, they didn't know what they should be looking at!  I also have my new eyelets and the spiral bones for the hips; it's all a little exciting.

I've also been a-googling and became very interested in pannier hips, particularly their reappearance in the 1920s which, until then, I had known nothing about.  I had started off on the Mermaid tail trail but the more I looked the less I liked.  Well, with the exception of this Steampunk costume which is kinda cool!


But, going back to my original costume, there wasn't a hint of Mermaid tail and the more I thought about making one, the more I felt like I don't want to turn this one into something so different.


I prefer hint 'o Mermaid and I like the idea of recreating my rather pitiful attempt all those years ago with my new and improved skills!  So, a little googling more, and I found this, this and this:


Lots of gorgeous pannier hips, Mermaid hips and everything.  To add to the general madness, I then found these.  Yep, can't go wrong with a little Miss Gomez!  It's the fringed skirt I love, it makes me think of seaweed.


I'm not sure how it all goes together yet but I'm already far more comfortable with it than I was the tail idea.  It sticks with my vintage vibe, includes trying something new and is far more "me" than any Mermaid tail would have been.

I've never been so confused by a costume before... there's a lot to be said for following a pattern!  It feels a whole lot messy most of the time, but I am also enjoying the randomness of it all; it's been giving me idea after idea, after idea.  It also prompted a rare moment of pre-planning and I ordered a wig.

Usually I'm so tied up in the costume that it comes to Halloween itself and I look blankly at my head and wonder what to do with it!  Last year's hairpiece was a very lucky last minute find.  Mermaid's, however, need Mermaid hair and I want no repeats of the shocking green nonsense I was so proud of on my first attempt.  I found a blue-grey wig quite by accident on Ebay and bought it before I could talk myself out of it.


Excusing the bags under my eyes and the rather goofy grin, I think I look good with a blue rinse ;o)  Now I need a big plastic crab or shell or something... every Mermaid needs a hairpiece!

Monday, 17 June 2013

The 1873 Corset - inserting the spoon busk and finishing the second half

Saturday morning I mused about the possibility of new garden furniture and the lovely boyf booked a round of golf in for the afternoon (instead of Sunday).  Consequently, just as I was dropping him off, the heavens opened and I retreated home to sew: the second half of the corset was calling...
 
I rather love it when you done something once, the second half just flows.  The only possibly tricky bit was the other side of the spoon busk (easing the buttons though the fabric) but, thanks to the flexibility of the linen I'm using, that went without a hitch.  In fact, thanks to the timestamps on my photos, I know it took 9 minutes from the first photo to the last!  In contrast, on my first corset, made with cotton, the same process took nearly forty minutes.
 
The first step is to stitch and press the new fabric panel and then line it up with the first side of the busk.  Make sure that the seam edges fit neatly and snugly together and then mark the placement of each button.
 
One busk + one matching fabric panel, stitched and pressed


To make the button holes you need an awl and a sharp pencil.  The trick it to carefully separate the threads of the fabric and then create a hole that is big enough to ease the button through, but will not tear the fabric.  If the fabric remains intact it will remain strong and secure; tears will need to be repaired otherwise they gradually will weaken further as the corset is worn.  To make the hole first ease the awl in and gently wiggle it, to part the fabrics, until you have a hole the size of the base of the awl.


One small awl hole...

and one larger pencil hole.
One hole made and the trick is to then gently ease the button through.  The linen made it easy as it is so flexible but it is still so important to take your time and care with this stage as the hole will not be quite big enough and any forcing will cause the fabric to tear.  Once the button is through, gently push the threads back together, around its base, with the awl.


Et voila!  Five perfect button insertions, and a gratuitous glimpse of my gorgeous new slippers ;o)


And we have a corset...


We're getting there, slowly. There's still plenty to do: eyelets (I was too punch drunk to risk them on Saturday, they need a steadier mind and hand!), finishing the seams, hems (including the boning on the bottom ones), the emboidery and any decoration, but for now I shall just enjoy it being in one piece... and have a proper think about how the rest of this mermaid is now going to take shape.
Related Posts Plugin for WordPress, Blogger...
© Lucy Green. Powered by Blogger.