


Wednesday, 31 October 2012

Tuesday, 30 October 2012
The Tudor Gown, Friday through to Sunday
huge
Definition: extremely largeSynonyms: behemothic, bulky, colossal, cyclopean, elephantine, enormous, extensive, gargantuan, giant, gigantic, great, gross, humongous, immeasurable, immense, jumbo, leviathan, lusty, magnificent, mammoth, massive, mighty, mondo, monster, monstrous, monumental, mountainous, outsize, oversize, planetary, prodigious, stupendous, titanic, towering, tremendous, vast, walloping, whopping
I spent a good part of Friday night looking at a great deal of fabric and thinking of other words for huge. I didn't think of cyclopean, will remember it for next time!
The instruction to hand stitch the skirt together, and then to the bodice, was met with a certain amount of belligerence until I started pinning it all together, at which point trying to do it any other way was obviously impossible. So, I can now tell you all that I can hand sew 11yds in 47 minutes. It's a detail, I like details. There's not much more to be said about an evening of stitching, stitching and just a little more stitching ;o)
We did, however, check on the shrunkies and are loving their progress; the 11 yr olds' long nose head is particularly cool with his veiny cheeks.


Saturday morning was when the work started in earnest. The first job was to attach the front of the gown to the front of the bodice or make 26" of fabric fit onto 8": this was done with two large pleats. First I attached the pieces at the seams then found the centre of both, marked them with pins, and joined then to create two large loops of fabric.


Once marked, each loop was then pushed flat along the waistline of the bodice until it reached the pin (either the at the centre or the side seam) and then folded back on itself to create a pocket. They were then pinned in place.


For the tightest/strongest seam I slipstitched and then overstitched the fabrics together every 3-4mm, making sure I went through each layer. It left a neat seam both inside and out.

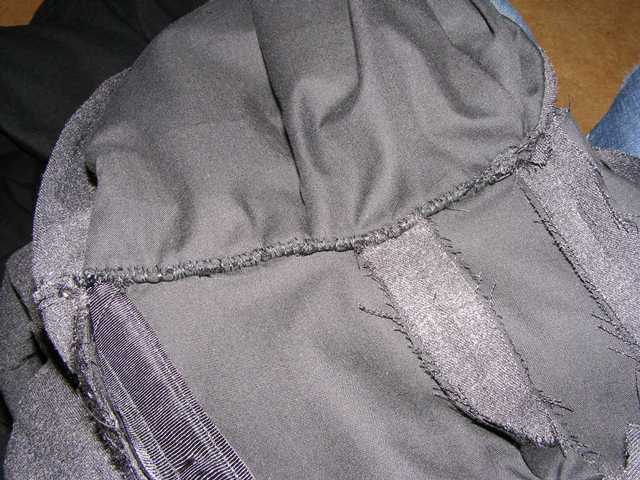

The remaining 80" now had to be fit to the 14" wide back! The instructions described a "hanging pleat" method; which followed along the lines of the front bodice pleats. Both sections were divided into eight, marked with pins and then pinned together to leave eight loops of fabric along the width of the back.

 |
| loving my new slippers ;o) |


The loops were then pinched together at the centre and pinned in place either side. Using the same combination of slip and over stitches, I attached the skirt to the back and closed each of the loops. These would then hang inside the skirt, invisible from the outside, whilst still creating the right look but with none of the bulk.


Finally, I attached the lining to the bodice.


Sunday was spent in a much more leisurely manner - apart from anything else I had housework to do and food to buy! I finished the sleeves, attaching their lining at the armholes and then folding them back and stitching them into place. The bottom of the gowns' bodice is supposed to sit higher than the kirtle, but doesn't... The reasoning behind this is to stagger the bulk of the costume but this isn't an issue in my case, I also think that the position will shift once it is laced in. I tried it all on and then dressed Miss G in the bumroll, kirtle and gown. I think it will be fine, but annoyingly I had to remake the plastron as it was more than an inch too short. As the gown bodice length is dictated by the length of the bones (total length - the seam allowance) I don't see how the corresponding plastron was ever going to be the right size. As remakes go though, it was quick and simple enough. I have not inserted the piping yet though, and will not until the gown has eyelets and is laced. Then I will fit the plastron to the gown and finish it along the final bodice line. I also need to hem both the kirtle and the gown... by hand... before Saturday... I have not yet dared measured that!


So, definitely getting there. One last comment, it is heavy. Without the corset and the petticoat and the bumroll it is heavy. Hard to breathe heavy. And this is using lightweight fabrics in comparison to some of the ones suggested; I don't know how you would breathe or move in a velvet, fur trimmed equivalent. And no, the Tudor's did not need to worry about being cold, not at all... I think I will spend my Halloween party haunting the garden to keep cool! It is a shame the headdress will not be done in time but, honestly, I'm not that upset, I couldn't be wearing that on top of all this, the coif will do just fine.
Sunday, 28 October 2012
The Tudor Gown, Wednesday & Thursday
This week has been spent on the Tudor Gown. It's been hard work! I changed day job and offices too, so all in all, there wasn't time to do everything and write about it. Instead. here are the highlights, day by day.
Wednesday evening was spent sewing the pieces of the gown skirt together. Six in all, two back (which form the train of the gown), two side and two front. There was also a matching lining. It was huge - the waistline is 11ft! - there was no use in taking any photos. they would have simply been of large piles of grey or black fabric. Instead I waited for Thursday afternoon, when the lovely Mr S and the 11yr old helped me demonstrate just how large the skirt is...

I also caught the 11yr old practicing her ballet in her pumpkin tutu outfit for the Halloween disco at school.

The rest of Thursday was spent relaxing with my lovely friend V, having curry for dinner and sympathising with Finn who had had "the op"...

poor Finn, he did look sorry for himself! If only lasted the night though, you'd not think anything had happened the way he's charging around now.
Wednesday, 24 October 2012

Tuesday, 23 October 2012
The Sleeves... the sleeves... *sigh*
It started off being a very relaxed evening last night, such a rarity in our house that I commented on it. It was at that point I jinxed myself. With everyone doing their own thing, and a little behind on what I'd hoped to do on the gown, I decided to fit the sleeves.
I love fitting sleeves. It is one of those points, when making a jacket or dress, that a group of relatively disjointed pieces start to come together and you get your first inkling of what the final item will look like. The first sleeve went in perfectly. The second? Well, there are no photos. I have no spare fabric left; thank goodness I'm a "round it up and add another metre" girl. It was nearly midnight when I got to bed; I could have got there half an hour earlier, but had a restorative glass of wine first. And the final sleeve is the third attempt. It was a long night!

Anyways, by then end of the evening I did, at least have two sleeves and, if all else fails, I'll make a very good Halloween bat or an Emperor Palpatine! I obviously need to fold them back and tack them into their final position. I also think that I need to play a bit more with the top of the lining; now that the sleeves are in the armhole, even with the easing of the seam allowance they feel tighter than I would like. I am going to get the skirt on, so that I can line and finish the jacket, and then I'll see what to do with the lining.

In the meantime, our "shrunkies" are coming on nicely (the 11yr old is fascinated by it all)... though, in my sleep deprived haze, I left the oven on this morning (I turn it on low for a bit each morning to keep everything nice and dry) so I may get home to "crispies"!
Subscribe to:
Posts (Atom)


