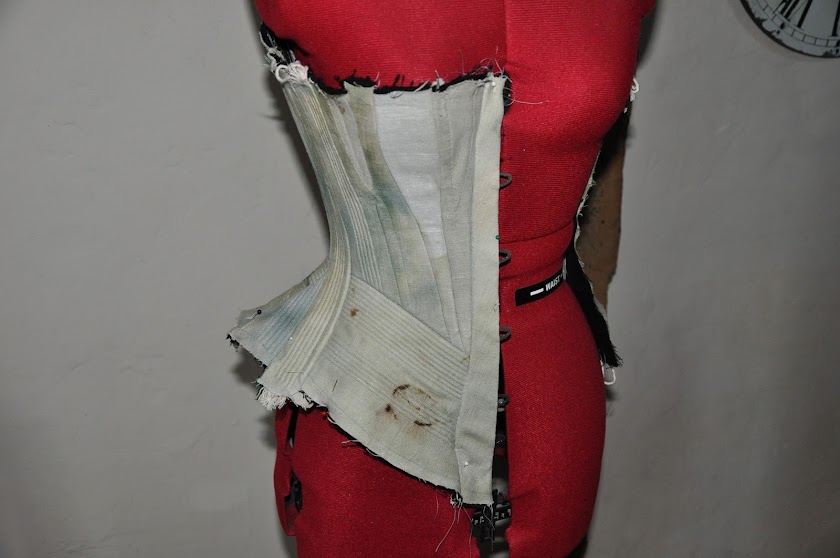
Out of paint and with not much else to do, I decided to put the next panel of the corset together. That went pretty well and, though I was planning to call it a day, I then decided to "just try" the center back panel. After that, with my little family all dozing on the sofa, it didn't take much self-persuasion to have a go at the center front panel, spoon busk and all. I have half a corset sewn together! Yes, there's a huge amount still to do, but finally, I have half a corset sewn together and it is looking good!
This is what started it all. On the right is the second gusset piece that I stitched together last night. I pinned and stitched the three pieces together. The center and right hand pieces have a small spiral bone, the center piece bone slipped neatly in between the seams and the right hand bone I inserted into the piece and then ran a line of stitching down the outside edge to hold it in place. I will finish the detailing on them later.
This is what started it all. On the right is the second gusset piece that I stitched together last night. I pinned and stitched the three pieces together. The center and right hand pieces have a small spiral bone, the center piece bone slipped neatly in between the seams and the right hand bone I inserted into the piece and then ran a line of stitching down the outside edge to hold it in place. I will finish the detailing on them later.
Once the top panels were finished, I added the bottom piece - my last set of measurements work very well. This is the first time that the three top pieces have fit width wise across the bottom piece.
I sewed the new panel to the first and that is where I planned to leave it... the photo below captures the colours of the linen very well.
The back panel starts with a traditional seam; sewn in right sides together, pressed open and then folded over and pressed again. The panel has a wide steel bone on the seam edge, a run of eyelets and a thinner bone on the other side of that. I drew in the lines for each bone, measuring the width needed for the eyelets in between. There will be 10 eyelets on each side, I will get the lovely boyf to help me put them in another day.
Finally, the front panel and the spoon busk. As luck would have it, the side I was working on was the easier of the two. The front and lining pieces are laid right side to right side and the busk laid on top. I marked either side of the clasps and then sewed the seam in, stopping for each break and double stitching either side of it for strength. One seam with five gaps to slip the busk clasps through. Changing the sewing machine foot to a zipper foot, I then ran a line of stitching down the outer edge to hold the busk in place.
The center back and busk panels were then sewn to the the main panel piece (the busk to main panel was the single most nerve-wracking line of stitching I have sewn in a very long time!) and I was happily doing a silly dance or two around Miss G. Oh, and taking lots of photos! I am going to insert a spiral bone along the bottom seam too, to kick out and stiffen the shape at the hips. I mocked it up with a spare spiral but will order two longer ones so that they will run from the busk to the back bones.
I just adore the shape of this corset and the hip in particular. The texture of the cording and the weight are seductive. I am seriously in love with this corset and can't wait to try it on... though there's a bit more of a wait before that happens, I shall have to be content to oogle it on Miss G instead ;o)


No comments:
Post a Comment